Wednesday 30 January 2013

WIP Wednesday - Amélie's Quilt

pinwheel collage

I've decided this week to join up with Freshly Pieced WIP Wednesday and show you Amélie's quilt that I have been working on. I made all those half-square triangles using Thangles, which Amy (Badskirt) very kindly mailed to me to try. I really liked using them and I will be sure to use them again.

Amelie's quilt top complete

The top is all pieced and the quilt sandwiched, ready to quilt. It has taken me weeks of pinning designs on Pinterest, and sketching in my sketchbooks, but think I have finally decided how I am going to quilt it. It will involve stepping a little outside my comfort zone, though.

Tuesday 29 January 2013

Duncan's Pencil Case

DSCF2437

My nephews from Townsville spent the summer at my parents' farm. During that time Duncan celebrated his ninth birthday, so I made him a personalised pencil case.

DSCF2438

It doesn't need to be necessarily for pencils, he can keep all sorts of things in there. His name appliquéd on the outside makes it nice and personal. I matched the lining to the appliqué, and finished it with a matching zip. Everything, except for the zipper came from my stash. Why is it that you can have hundreds of zippers and yet, rarely are any of them suitable for the project you are working on?

SYST: I used approximately one fat quarter for this project.
Running totals, in = 103, out = 22, total = +81

Monday 28 January 2013

All Smocked Up

Art Smock Front

It's really hard to believe right now, but on Thursday Liam starts school. When I was reading through the information pack, I noticed that he needs an art smock, so I made him one, using some fabric that has been in my stash for more than three years! The space fabric is Space Cases, by Patrick Lose and the Green fabric is by Amy Schimler - both are from Robert Kaufman.

Art Smock back

I used Kellie Wulfsohn's tutorial to make the smock. If you have an A3 printer, you can print the top half of the patterns on A3 in landscape format and sketch out the rest.

I'm not sure I am ready for my first baby to go to school yet, but at least we have his art smock all sorted.

SYST: I used approximately five fat quarters for this project.
Running totals, in = 103, out = 21, total = +82

Wednesday 23 January 2013

Because I am a Dag....

Just whipped up a quick skirt

I made Amélie a skirt with the left-over fabric from my skirt. So we now have matching skirts.

upload

Because that skirt was so easy, I made this skirt. Which also matches one of my skirts.

I guess we'll have to consult each other before we dress to go places now?

SYST: Total amount of fabric for the two skirts is approximately three fat quarters. 
Running totals, in = 103, out = 16,  total = +87

Saturday 19 January 2013

Make a Wish

Wish...

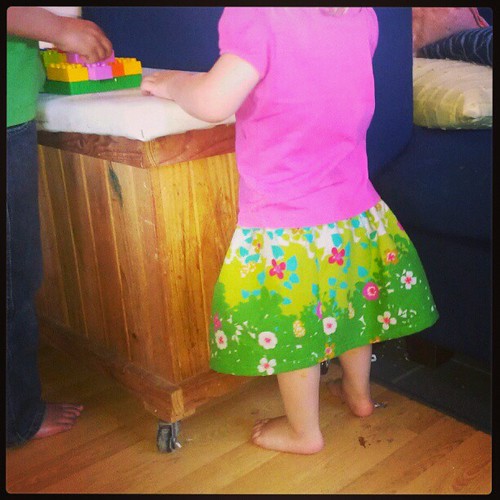
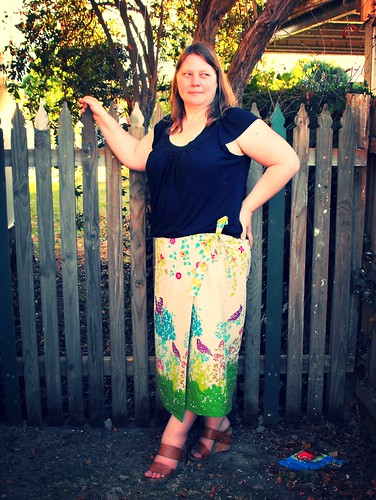
I've had this Echino "Wish" border print fabric in my stash for some time, wanting to make a wrap skirt from it, but not wanting to mess up my beautiful fabric. I used LiEr, from ikatbag's tutorial to figure out dart sizes and positions. I did quite a few things differently to the tutorial and there are a few other things I would change if I was doing it over. I am really happy with the final result though.

Wish Wrap Skirt

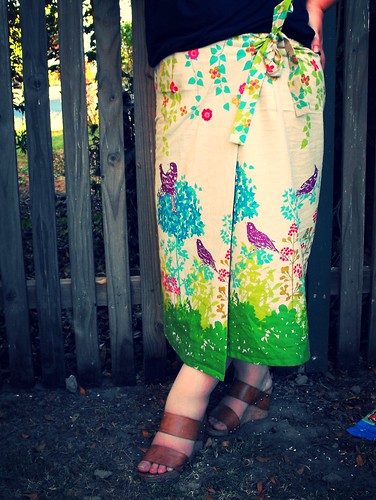
I added a facing along the front edge, using knowlege I gained from sewing this wrap skirt. I also added a facing along the top edge, instead of just folding it over like is done in the tutorial. I made the facing by laying the skirt out flat with it's darts over some paper and traced along the top edge to make a pattern. After attaching the facing to the top edge of the skirt, I understitched it to make a nice top edge, and I also stitched along each of the darts to stop the facing from popping out the top of the skirt. Both facings were interfaced.

DSCF2449

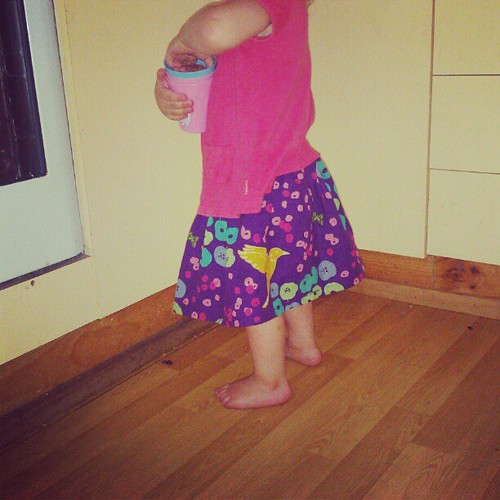
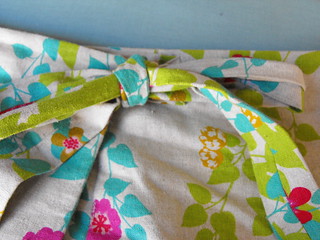
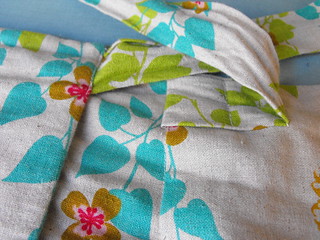
I was really undecided about the ties. I was going to put three largish buttons up near the top of the skirt, matching one of the colours in the print, but I had trouble finding buttons that were the right colours in the right size. I went back and looked at wooden buttons, and found some heart-shaped buttons. I was really in two minds about them. If they were round, I would have done it, but I thought they made too much of a statement, which would compete with the bold print on the skirt. I probably should have grabbed them anyway, as they would be good for a skirt in a plain fabric, I think. So I decided to go with ties. Instead of placing a long tie on the inside edge of the skirt, I inserted it into the dart on the left side and placed a button and buttonhole on that edge. This means that I don't have all that extra tie popping up out of the back of my skirt, and makes it a little easier to put on, since I don't have to thread it through anywhere either.

DSCF2451    DSCF2453

One thing that I would do differently is with the measurements for the darts, it is suggested that you take 1.5 x your hip measurement. This means that you have half a body measurement of overlap. I think this is a little excessive. It aso meant that when I wrapped the skirt around me, I couldn't do the ties up without the skirt being too loose. I know that the original tutorial doesn't have the strap stitched into the dart, but it does have it slipping through there, so there would have been the same problem. You need a bit of extra space for the knot as well. I am thinking next time around, I will use about one and a third times my hip measurement for the length of fabric. I ended up folding the strap back and stitching it to the skirt. Not ideal, but you can't see it once it is tied up. I will be topstitching along the edge I stitched down though, so there isn't too much stress on the fabric.


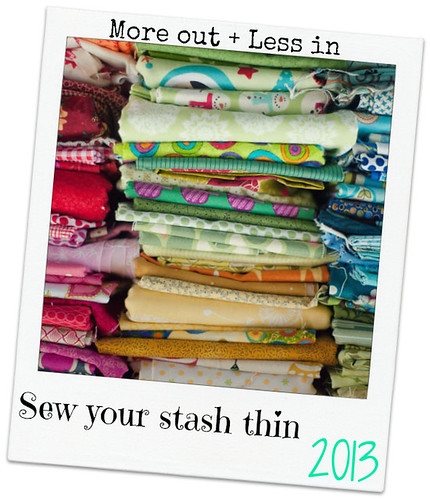
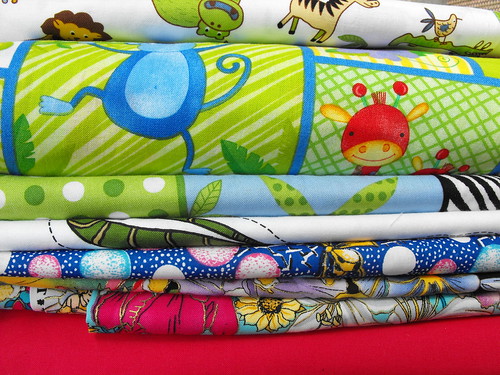
SYST: This project used approximately six fat quarters of fabric. +96 - 6 = +90

Saturday 12 January 2013

Sew Your Stash Thin

sew your stash thin 2013

One of my goals for 2013 is to get my fabric stash under control. After some discussion with some other online friends with a common goal, we decided to have a stash-buster-along, hosted by AJ, over at AJ's Antics.

I am not one to join in with "fabric bans", if I need want fabric for something, I will buy it. This is not the idea of the challenge. The idea is to use it. Use what we buy, use what we have in the stash, use MORE fabric than we buy. Fabric OUT is only fabric that is used in completed projects. Fabric IN is any fabric that crosses the threshold in 2013. Hopefully by the end of the year, this will mean there is LESS fabric in the stash.

DSCF2434

So anyway, I signed up and would you believe it, the VERY NEXT WORKING DAY, an unexpected parcel arrived from my mother-in-law. It was FULL of fabric! Almost 14 metres of fabric! Yesterday I came home with almost 9 metres of 150cm wide curtain lining fabric from Spotlight for Amélie's curtains. So far this year, all I have completed is 10 pairs of underpants for Amélie. I guess I had better get sewing!!!


Photobucket    After some measuring, these are my estimates:   
          • Fabric from my mother in law (+55FQs)
          • Curtain lining (+48FQs)
          • Amélies undies (-7FQs)
    Total : +96 Fat Quarters

Monday 7 January 2013

Ty's Teddy Bear Hat

Ty's Hat

I made this hat for Ty for Christmas. Ty isn't quite three months old yet, so the hat is still a little big on him. It should fit him better next year.

Ty's Hat

Don't be fooled by my hand, it makes the hat look smaller than it is. You can see the same sized hat here and here. It is the baby hat from the Nicole Mallalieu, "You Sew, Girl!" book. It took about an hour and a half to put together, though I would advise, if you are using fabric with scattered prints (like this one), that you take the extra time to make sure that the bears are not all upside down!

Ty's Hat lining

I love the structure of the drill fabric and how well the lining goes with it. Both fabrics are from my stash.

Thursday 3 January 2013

Toilet Training

That Darn Kat undies

We're making the most of the warmer weather and toilet training Amélie. I have been busy, sewing together lots of these undies, using the That*Darn*Kat underpants pattern.

upload

What are your best toilet training tips?
Do you have a favourite underpants pattern?
Any tips for putting together better undies?
Blogging tips