Friday 31 August 2012

Tutorial: Over-sized button-holes

Bigbuttons

Today I am going to show you how you can trick your sewing machine into doing over-sized button holes.

DSCF1942

My old sewing machine had the old-style four step button hole. When I got my new sewing machine, one of the features that I was really excited about was the automatic button-hole feature. Now, I just plonk a button in the slot and push a few buttons, press start and away we go. Perfect button holes to perfectly fit my buttons.

DSCF1947

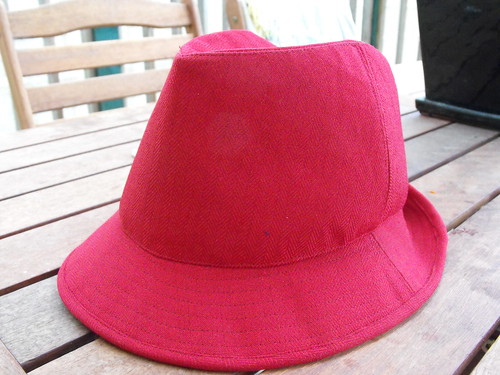
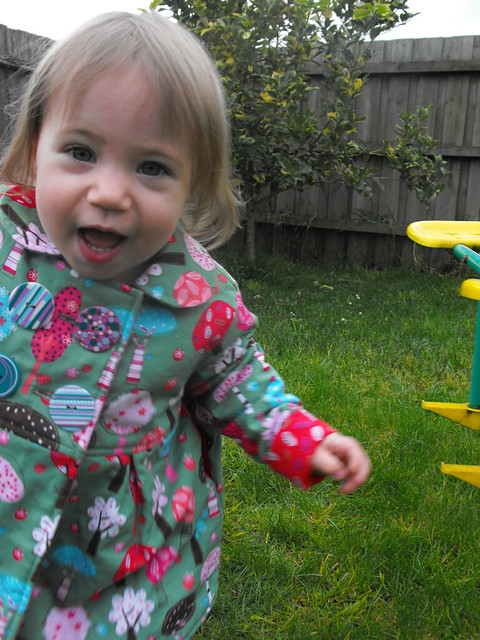
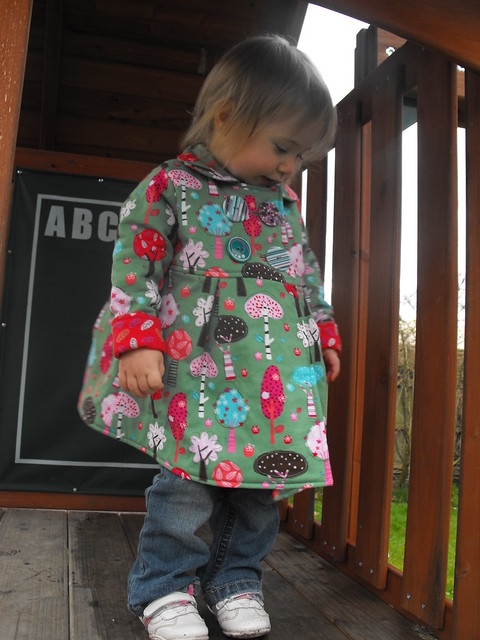
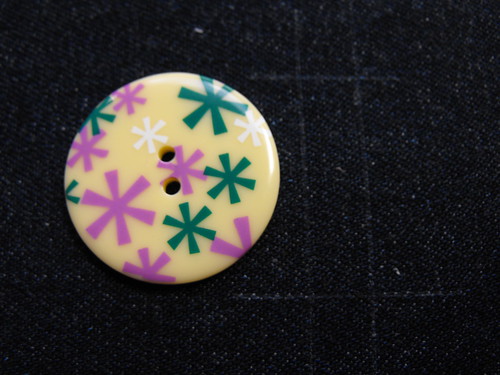
Then, when I made Amélie's Serendipity Coat, with those lovely big buttons, I discovered that not all was fantastic with the automatic button hole feature. Ugh! Those buttons won't fit in that slot! So here's what I did...

buttonholesteps

The first thing you should know is that the "automatic buttonhole" is still kind of like a four step button hole. Instead of you doing the button pressing or knob turning, the button-hole foot does all the work.

DSCF1975

Grab yourself an erasable fabric marker*, (the one I'm using in this tutorial is a white one that is made by Clover - great for dark coloured fabrics like denim) and mark out where you want your button-hole.

DSCF1956

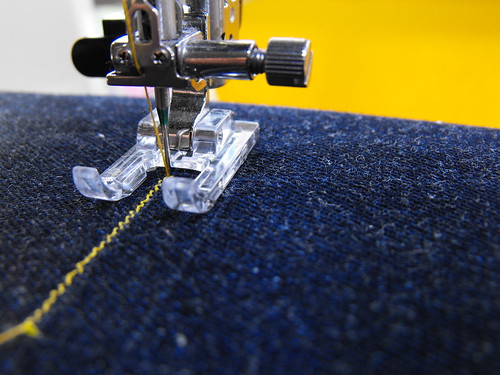
Now extend those starting and finishing points out to the right, so that you can see them beyond the edges of your machine's foot. Place another line, parallel to the buttonhole position, to the right, so that you can see where you are heading when you are sewing your button-hole. My parallel line is about 3/8" away from the marked button-hole line. This puts it just outside of the edge of my presser foot, so I can easily line things up and keep my button hole nice and straight.

DSCF1972

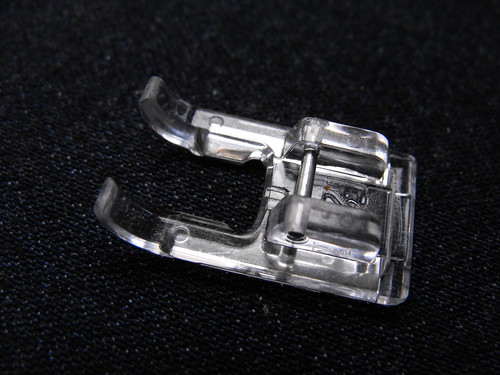
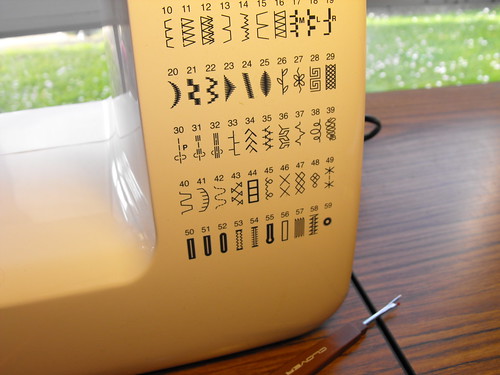
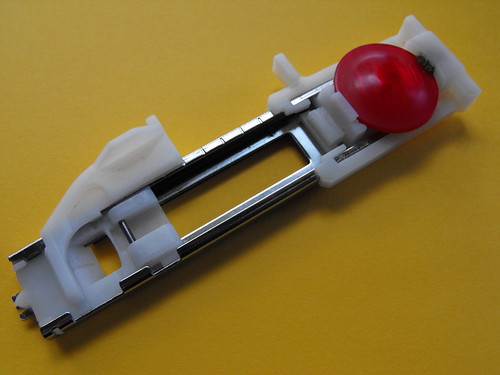
Pop a regular presser foot on your machine, or if you have one, an embroidery foot, because it won't catch on your button hole stitches and it's nice and easy to see what is going on. Set your machine up to do button-holes and lower the black lever.

DSCF1957

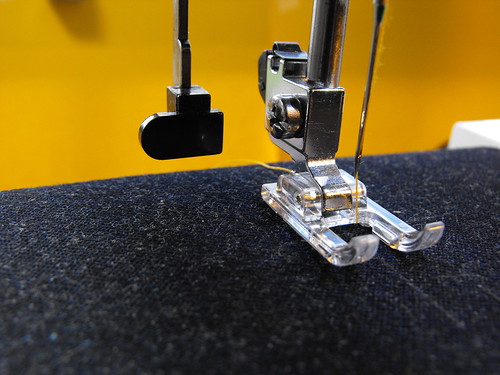
The black lever is key here. My button-hole stitches won't work at all unless that lever is down, because that lever tells the machine when each "step" is finished and when to begin the next "step". The lever acts like a button/switch/knob, and the automatic btton-hole foot, when you use it, acts like your finger, pressing the black lever "button" as it goes. For over-sized buttons, we push the lever, in the same way that the button-hole foot does.

DSCF1959

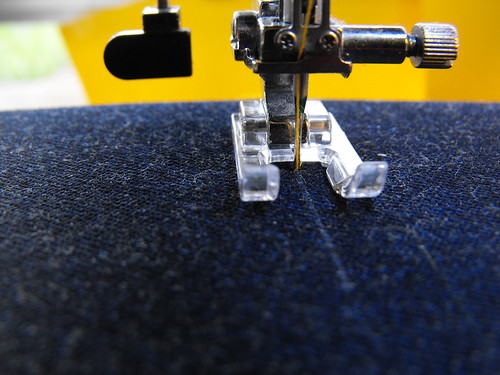
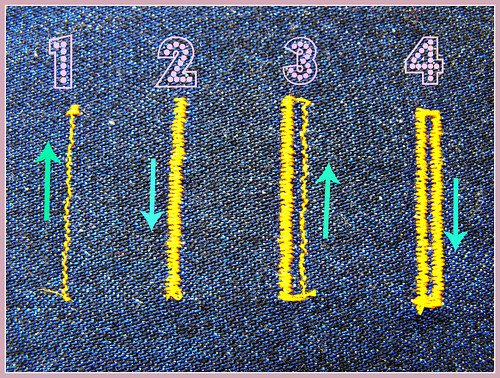
Starting with most of the button-hole under the foot, and the front edge lined up with the needle, (remembering that button-holes are sewn backwards!) lower your needle and begin to sew. I don't use the "start" button for these button-holes. I like to have a bit more control over the speed, so I use the pedal.

DSCF1960

When you reach the line at the end of your marked button-hole, press the lever from the back. That is, push the lever towards you.

DSCF1961

When you reach the front edge of your button-hole, push the lever from the front, that is, push the lever away from you.

DSCF1963

When the machine reaches the line again, push it from the back, as before. You will need to repeat this, pushing the lever in the direction you want the stitching to go. Please bear in mind that the amount of lever pushing, and the direction will vary from machine to machine and from button-hole style to button-hole style.

buttonhole steps

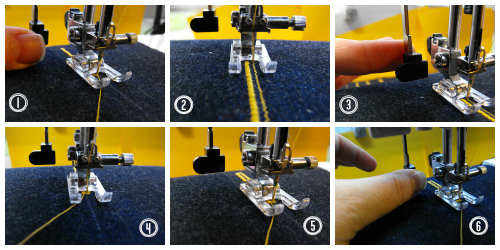
The last step is to push the button backwards and then sew the bit that goes across the front end. Voila! Finished button-hole! Well, once you open it, it is...

DSCF1970

Now, if you want to do this yourself, I suggest that you have a few practise runs with some scraps before you tackle your actual project.

*Always test a disappearing ink pen on a scrap of your fabric first to make sure that it disappears and never iron over disappearing ink as it may cause it to become permanent!

Thursday 30 August 2012

Magnificent Mice

DSCF1851

I stumbled across this really cute pattern whilst browsing the internet last week and I was so excited by it, I snapped it up right away. The pattern is called Brave Mouse Aviators and is a downloadable pattern by Bustle & Sew. I would love to make them using some lovely wool fabric like in the pattern, but I don't have any so I'm making mine with some wool felt instead. I'll come back and let you know how it all goes when I'm done.

Want to see what other crafty people are doing this week? Head over and visit Our Creative Spaces to have a sticky beak.

I'm having a hat-sew-along during the month of September. If you would like to make a hat during the month of September, you can find my sign-up post here.

Wednesday 29 August 2012

Leave Your Hat On!

hatmosaic

It was a beautiful, sunny day here yesterday. I put Amélie's hat on and noticed it was a bit on the small side. It's time she had a new hat. The boys could both use new hats too, and as spring is coming, and with it the warmer weather(!) and UV rays and all that, it is time to get hat making. I figured that I'm probably not the only one who needs to get onto this, so decided to make it a sew-along.

Liam HAT

I've made quite a few hats over the years, the first hat I made was from an old Top Kids magazine, from when Liam was about six months old. I then made another hat for one of my nephews, using the same pattern.

Duncans hat

Later, I discovered Nicole Mallalieu (also known as "You Sew, Girl!"). I had seen her bib pattern on-line and had read a few of her blog posts. Then I went to a Stitches and Craft Show and actually met her. I saw the Kids' Hat pattern and ummed and ahhed about it. Honestly, I thought it was a bit expensive. I really had only ever bought commercial patterns and had never had a boutique pattern before. I ended up buying it and boy, am I glad I did! It was definitely worth what I paid for it and I have made heaps of hats using that pattern. There are heaps of hints and tips in a "You Sew, Girl!" pattern that you will never get from the big commercial pattern companies, and I've been hooked ever since.

DSCF1106

There are heaps of other hat patterns out there. I also have Nikki's Fedora pattern, and her book, which has a couple of cute baby hats in it. Some of my friends are really happy with the "Make It Perfect" bucket hat pattern and another recommendation I've heard is the Oliver + S hat pattern, which is available as a free down-load.

DSCF1092

I'm not fussed about which pattern you use. We'll all motivate each other to get our hats finished before the end of September. I plan to try out a few new embellishment techniques, you might want to try them too? If you have any trouble with your hat(s) you can leave a comment on my blog, or message me if you want to be anonymous and we'll try to help each other, ok :)

DSCF1009

So, are you ready to sign up? Just add your name here:


And grab your button here:

SOLOMON SEWING


So, now that you have signed up, tell me about what you plan to make. Which pattern are you going to use? Who is it for? Are you planning to embellish it a bit?

Saturday 18 August 2012

A Happy Accident

DSCF1710

Back in July, I did a little pattern testing for Toni Coward of Make it Perfect. The pattern I tested was called Serendipity. Serendipity means "a happy accident". I think those beautiful big buttons being such a good match for my fabric was a happy accident.

DSCF1711

If you are a fan of Toni's other patterns, you won't be disappointed. It has all the features you have come to expect from Make It Perfect.

DSCF1717

This warm winter coat is double breasted with pleat details in the front and back and a lovely Peter Pan style collar. There are little pockets in the side seams to keep those hands nice and warm and the coat is fully lined and padded with wadding to help keep your little one nice and toasty on cold, wintery days. I really like the turned up cuffs.

DSCF1713

Toni has a neat technique for turning the coat out the right way, with only a small amount of hand stitching where it will never be seen.

DSCF1706

The pattern size I tested was for a size two. It is a little large on Amélie, but fairly snug in the sleeves. If you like to pile lots of clothes on under the coat, you should probably make it up a size bigger.

DSCF1716

Tuesday 14 August 2012

Noah's Ark

DSCF1007

Every year, Embroidery Library send me a voucher for my birthday. I went for a bit of a look around their site to see what I would like and found this awesome "in-the-hoop" Noah's Ark Puppet pack. In-the hoop means the whole puppet is made in the hoop. There is no having to stitch it all together at the end, the embroidery machine makes the whole thing. Ingenious!

Untitled

I ended up getting a pretty good deal out of the whole thing. In addition to being able to take $10 off my order, the same weekend as my birthday, they had a deal going where you could get 40% off your order, and receive three free designs as well. I was able to combine this deal with my birthday deal and ended up paying about $5 for a $25 set. Embroidery library always has great deals going, so I hardly ever end up paying full price for anything there. If you've got an embroidery machine, they are well worth signing up to. Just make sure you tell them your birthday.

Untitled

Anyway, so I had a bit of fun sewing up these cute little puppets. I am very tempted to go back and buy the fairy-tale set as well. I've told myself that I need to make more of the animals before I start buying any more puppet packs. Really, being a Noah's Ark set, I should be making two of each.

Untitled

A few little tips I would give someone making these:
  • Instead of spray glue, get yourself a Sewline glue pen. It's nowhere near as messy, and much easier to just put a dab where you need it. You use it instead of using pins just to hold everything in place. I found the spray glue stuck a little too well, and with some of the felt it stretched it out of shape a bit.
Untitled

  • Use good quality felt. Some of the felt I used was cheap polyester stuff from my local shop and from Spotlight. You can really tell the difference between the two tigers. The one on the left was made using felt from Plushka, the other was made using the cheap felt. It is so worth spending the extra money to get really nice felt, these little guys don't use very much anyway. The zebra was also made using cheap felt, whilst the Panda was Plushka and the pig and the Monkey were made using felt from Winterwood.

DSCF1012
  • You can skip a lot of the colour changes by using the same colour thread for a bunch of steps. For most of these puppets I used just three colours of thread, one to match the main felt colour, and then the black and white for the eyes (though sometimes I used silver and dark sepia). Generally, for the first four colour changes I used the same colour thread as the felt and then again for the last colour change.

DSCF1007

It's been great fun making these little finger puppets. I would like to try more different kinds of puppets, maybe even design some myself? Do your kids like playing with puppets? Did you play with them when you were little? Have you ever made any puppets? Do you know of any good puppet patterns?

Come and join me and some other crafters over at And Sew We Craft...

Saturday 4 August 2012

Thirty-nine.

Girls Style Book

Two days after Liam turned five, I turned thirty-nine. It felt a bit like it was still Liam's birthday. Actually, as he was still receiving presents and mail, it felt like it was still Liam's birthday more than a week later. I have a feeling it is going to be a bit that way for ever. I didn't miss out though.

Girl's Style Book

Back when Mum and I went to the last quilt fair, we stopped in at Tessuti. I was admiring this book, but I had a limited amount to spend at the fair, so I didn't want to blow a big chunk of it before we even got there. Mum noted my interest, and I got the book I wanted for my birthday.

Girl's Style Book

There are lots and lots of pretty dresses and accessories. Some made of beautiful, Liberty fabric, some with smocking, tucks, pleats, gathers, bows and gorgeous hats and headbands and little purses and hand-bags with instructions for everything. I can't wait to start making things out of this book. Grow, Amélie, Grow! (But not too much, I want you to stay little too!) It's a Japanese book, but it is so popular, that this one is in English. Which is great, because I can't read Japanese.

Surgical tools!

As if that wasn't enough, mum also got me some tools, so I can do surgery now....

Ready for some surgery!

haha, actually, these tools I have heard, are great for making stuffed toys with. I might have to do some research and consult with some experts.

Thursday 2 August 2012

F.I.V.E.

Liam & I - Three weeks

Five (and a bit) years ago, this little guy came into my world and changed my life.

Untitled

In some ways, it seems like yesterday. In others it was so long ago it's like a lifetime has passed.


Blogging tips