Showing posts with label Walking Foot. Show all posts

Friday, 5 November 2010

EB DQS4 - What I sent

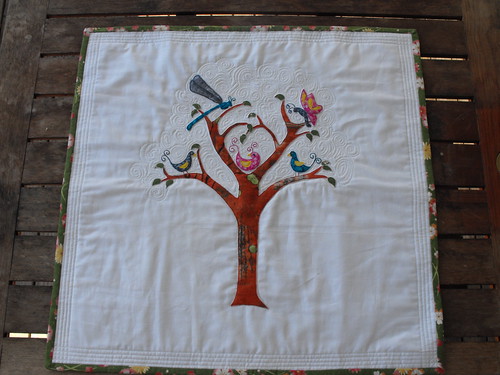
DSCF1494

This is the doll-quilt that I sent Anna for the EBDQS#4. I have named it Matilda's garden, as it to be used as a wall-hanging for her daughter's bedroom. I have used some of my Laura Gunn fabric (Vases from the Lantern Bloom collection) for the tree. The leaves are from the same fabric as the binding, which I found at Spotlight.

The free motion quilting is based on a spiral technique that I learned at a workshop with Kellie Wulfsohn. I was busy spiraling away between the branches with the intention to keep going, when I saw that I had given the tree a bit of a ghost effect. I kind of liked the way it looked and stopped where I was. I took it out to mum's and dad's and they liked the way that it looked too. I also got another opinion from AJ, who agreed that it was a good place to stop. Sometimes creativity is knowing when to stop!
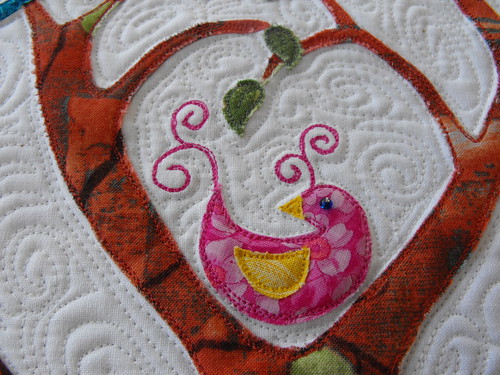
DSCF1498

The pink bird at the centre of the tree represents Matilda. I have used a seed bead for her eye. The branches form a heart shape around her.
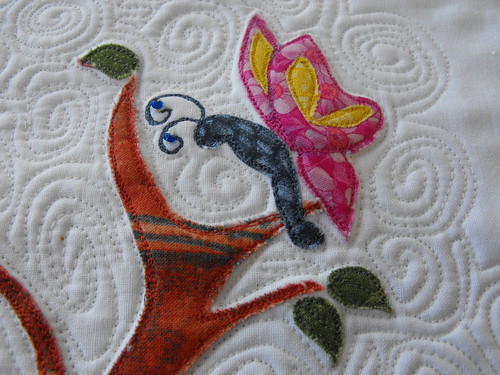
DSCF1500

The butterfly represents Anna (my swap partner, and Matilda's mum). I have also used seed beads here to embellish the antennae.
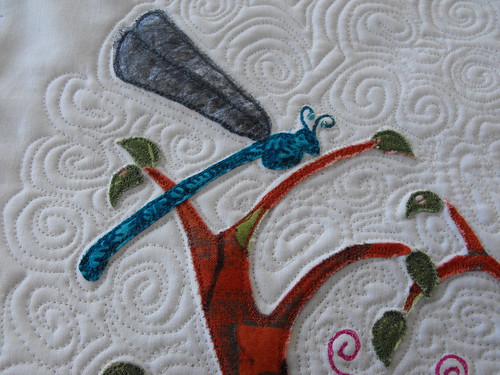
DSCF1501

The dragonfly represents Matilda's father. I used some Pellon Rainbowspun for the wings. The Rainbowspun was in the Vilene showbag that I purchased at the Stitches and Craft Show back in May.
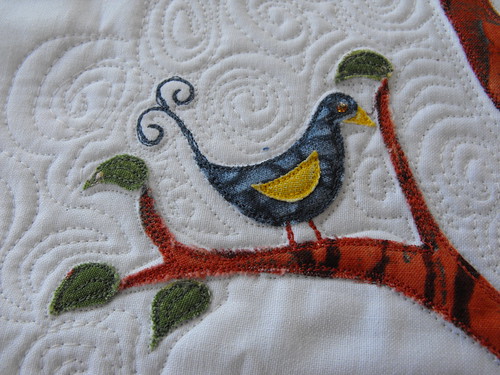
DSCF1497

This bird represents Tom, Matilda's older brother.
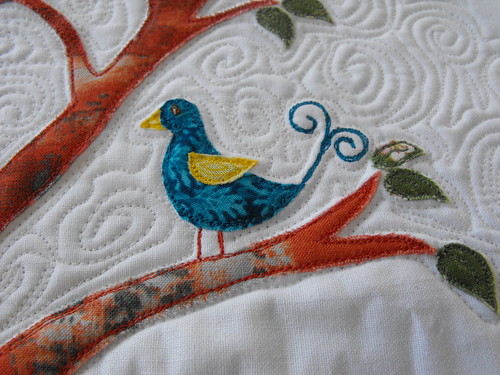
DSCF1499

This bird represents Matilda's baby brother, Nate.

DSCF1496

I am pretty happy with the binding. Even though I had some sort of mobius thing going on when I went to join the ends, I managed to work it out in the end. Around the edges of the quilt I have done some straight quilting, using my walking foot. I wasn't sure what to do here, so I asked AJ for some advice. I think it's a winner.
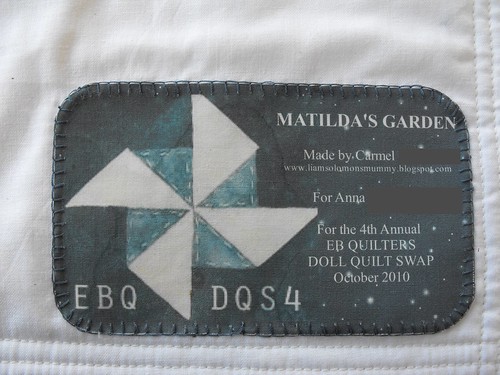

DSCF1502

The label. I am much happier with my blanket stitch on this one than on the one I did for the boys' eye spy quilt. I used a slightly different (probably non-conventional) method that seems to work better for me.
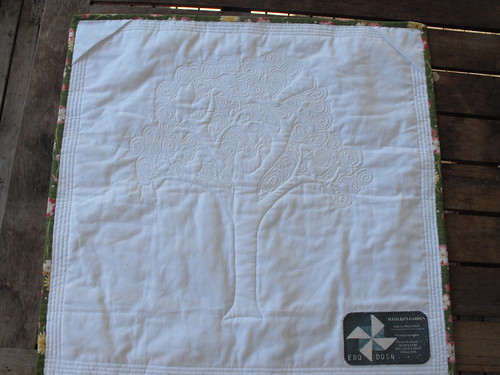
DSCF1505

I placed some corners at the top of the quilt to allow it to be hung from a rod on the wall. AJ shows how to do this on her blog.

I almost forgot to mention, I'm not sure if you can tell by the photos, but I did some Trapunto on the quilt. There is extra padding behind all of my appliqué. I used a technique that I was able to sort of work out from the instructions for Kellie Wulfsohn's monster quilt in the Australian Homespun magazine. If I was designing a quilt again, and I wanted to do trapunto, I would probably avoid some of the tiny gaps I had to get around as trimming away the extra batting was rather tricky - I was so scared I was going to chop a great big hole in my quilt whilst I was doing this!

Thursday, 22 October 2009

My Creative Space

My Creative Space this week was largely dominated by this Laptop Bag. Actually, to be honest, my creative space was dominated by a pair of toddlers. I don't know if it is just me, but the stronger my desire to get into the sewing room and get something done, the more desperately the kids want my attention. I need to practise acting more cavalier...

The laptop bag has a large patch pocket on the front, and a divided pocket across the inside at the back. I made fabric straps out of the pinwale corduroy, and I added a little hook (not part of the pattern) so mum can put her keys in there without losing them. I've added my hand made label to the facing above the inside pocket. The bag also has a hard base and purse feet.

As always, I learned some new things and developed some new skills whilst making this bag. The first may help clarify the previous blog post...

Sometimes it is difficult, or even impossible to use pins to hold things together. There are various things you can do to get around this, like paper clips, bulldog clips, hair clips, sticky tape... anyway, Nikki advises using sticky tape to hold various things in place throughout the project - which is a really, really, good tip. I used sticky tape and then sewed over the top, through the tape (along the entire length of the seam. I am not really sure what the cause was (Nikki uses tape from Officeworks, mine was Scotch Magic Tape, or maybe my needle was a little blunt?) Removing teeny tiny bits of sticky tape from pinwale cord isn't fun... so here's a tip; Use tape in place of pins where required, but remove it before your presser foot reaches it. Actually, another really good tip is to read all of the instructions before you begin a project, because Nikki does advise this in her instructions!

Another thing I have learned from this project is, if you have a machine that struggles with wadding (the feed dogs on mine totally ignore wadding), a walking foot can be your saviour. You will still need to backstitch your ends though, and I have been advised that walking feet are like emus and kangaroos, they don't do backwards, so you need to swivel your project, and sew back in the other direction, and then swivel back again to sew in the correct direction.

Beware of velcro, as it may stick to your clothes, parts of your project, and other items laying around the sewing table, and unguarded sticky fluff removing devices can also stick to projects if you don't put them away. I was having major dramas with everything in my sewing room being stuck together this week!

Sometimes it is nice for things to stick together though, and due to another tip in the pattern, I actually used the applique spray that mum gave me (ages ago), and wow that stuff is brilliant! I will be using it again - LOTS!


If you want to see what is happening in other people's creative spaces this week, wander over to Kootoyoo, and take a look!

Tuesday, 16 December 2008

Domestic Goddess


One of the mum's in my mum's group has been baking stuff for when we come over. She makes this really yummy slice which is really just a rum balls recipe, pressed into a baking tray. I call her a domestic goddess! Anyway, this domestic goddess got to be my KK, so I made her these oven mitts. I also got her a couple of those little Women's Weekly cookbooks and a wooden handled, red spatula.

Thursday, 4 December 2008

November Challenge

During the month of November, a challenge was set on Essential Baby to sew an oven mitt. Photobucket Well, the oven mitt got finished with the exception of raw edges, before the end of November. The raw edges were zig-zagged, completing my oven mitt on Tuesday. So not really completed by the deadline, but understandable under the circumstances.

For my oven mitt, I used this tutorial. If I was doing it again, I would make the oven mitt bigger as it is a very snug fit.

Through doing this challenge, I actually used my walking foot for the first time. I quilted for the first time. I also jammed up my overlocker for the first time. Which is why it took me until Tuesday to finish the raw edges. I finished it off with zig zag. I might try next time to overlock the edges before sewing the top and bottom pieces together. Or I might just zigzag again. But jamming up the overlocker was not fun at all.
Blogging tips