Showing posts with label You Sew Girl. Show all posts

Monday, 20 October 2014

Winter Flat Cap

Flatcap

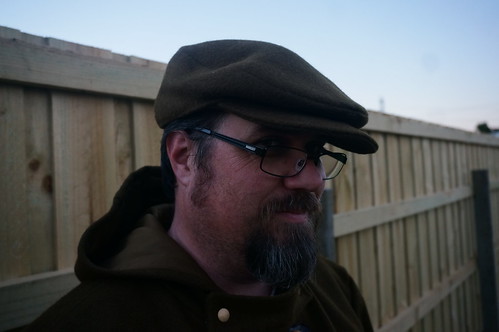
When I made Maxx's coat, I had some leftover fabric, so I made him a matching flat-cap using Nikki's "You Sew, Girl! Flat-cap" pattern. I cannot believe it has been almost two years since I made his last flat-cap. This one is warmer for winter than the last one.

Despite the heavier fabric, this hat was much easier to put together than the last one was, and sewed up in no time. I also have a couple of these cut out ready for the boys.

Wednesday, 11 June 2014

Purse-frame bag

Purse Frame Bag

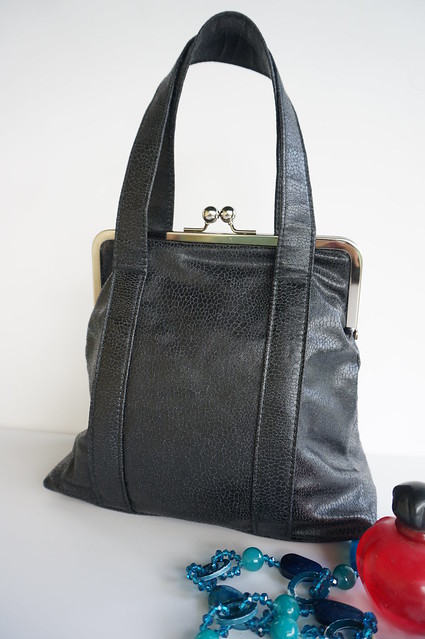
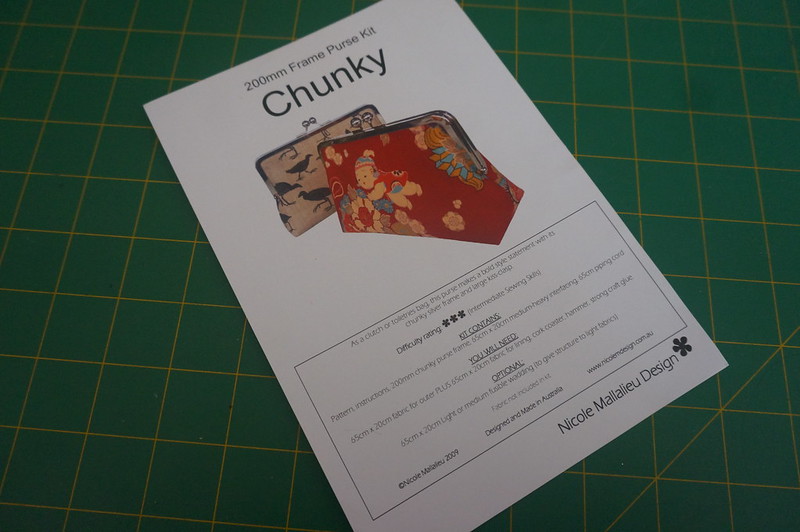
Whilst I have heaps of bags, I felt like I needed something that was a bit more suitable for going out (smaller), that goes with more things. I have always thought that a bag with a purse frame would be cute, but I didn't have a suitable pattern, so I made it using Nicole Mallalieu's 200mm Chunky purse pattern....

"You Sew, Girl!" Chunky 200mm Purse Kit

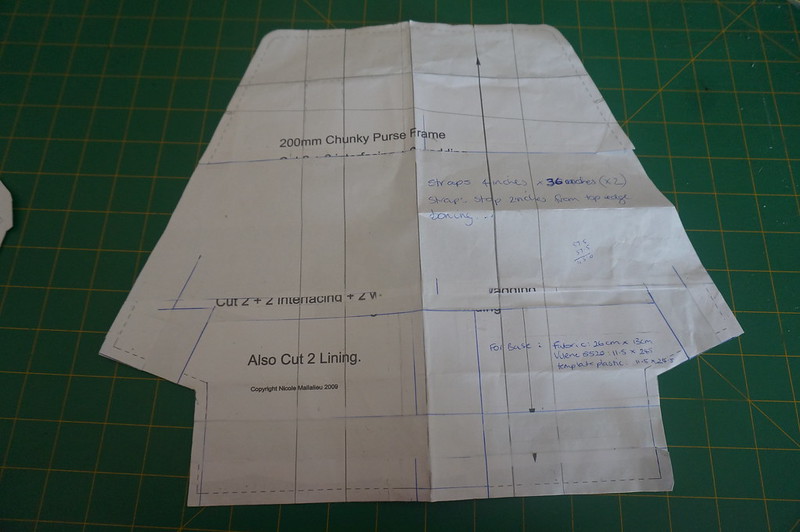
I guess you can tell that I had to make a few modifications to actually get the bag to look like it does using that pattern. I had to slash and spread the pattern to make it bigger in all directions, except for the frame part. I started sewing up a trial bag before I worked on the real thing, but that has mostly been abandoned.

Modified purse frame pattern

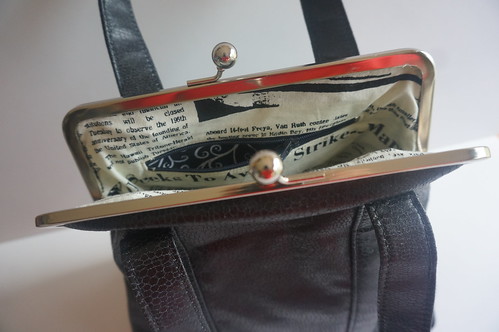
The fabric for this bag came from Darn Cheap Fabrics. I think it was about $15 or $16 per metre? It is a fake leather type fabric with a texture that I think is meant to be a bit like snakeskin. The fabric has a bit of stretch in it. I guess it is designed to make skirts or pants out of? I added some iron on wadding to help give the bag some structure and to remove the stretch. There is also boning added behind the straps to give extra support, and help keep the bag standing up straight and tall and not slouching into a puddle.

I love the newsprint lining - I think it adds to the vintage feel of the bag. Mostly, bought bags seem to have a dark lining, which I guess is meant to help hide the grime, but I prefer a light-coloured lining, as it helps me to be able to see inside a bag.

Purse Frame Bag - look inside!

I used the instructions in Nikki's new book "The Better Bag Maker" to help me make the zipped pocket inside. Normally, I would be going through my pattern stash, looking for which patterns have that set of instructions, or check my notes from the zippers for bags class I attended - but now I have the book, so I can save myself heaps of time by just referring to that.

The purse also has a nice hard base and cute little round purse feet on the base. Instead of just using it to go out, it seems to have become my everyday bag.

Monday, 17 February 2014

Sneaky Peeks and a Skinny Stash

DSC00579

You may not know this, but one of my favourite pattern designers, Nikki (Nicole Mallalieu of You Sew, Girl!), has a new book coming out really soon. This will be her second book. Yes, she is THAT good. I did some pattern testing for the book last year, and I am not sure if I am able to show the full, finished bags, but above and below are some sneaky peeks for you (shh!).

DSC00580

The book is called The Better Bag Maker and from the small amount that I have seen, it will be jam-packed full of snazzy tricks to get a great finish to make beautiful hand-made (as opposed to "home-made") bags. It doesn't get released until May, but you can pre-order it now at a lower price from Fishpond* or from Amazon and I am sure, many other great retailers. I will try and remember to come back and show some photos of the full finished bags once the book has been released, if I can tear myself away from it long enough to make a blog post.

The Better Bag Maker

To create these wonderful bags, I used at least 12 FQs of fabric. I had to estimate as I didn't keep track, and sometimes fabric can get hidden inside pockets and these bags had plenty of pockets! Since these were made last year, they contribute to the SYST challenge. I also used approximately 3 FQs to make Amélie's Gingham Puppet Show Shorts. In addition to this, I gave away approximately 8 FQs of pale pink fleecy to my mum so she could make some things for my niece. It had been sitting in my stash for a while and I don't really do pastel colours. My friend, Amy (Badskirt) gave me some a metre of crazy fish fabric as well, so that adds 4 FQs back into the stash.


MY FINAL SYST 13 RESULTS!:
in = 144, out = 293, total = -149


In conclusion, I used more than double the fabric to what was added to my collection. My stash is over 35m of fabric thinner than it was 12 months ago. Whilst the totals weren't mega-huge, a lot of rather small things were made. A lot of what was added to my stash was given to me too, so my over-all spend was really quite low. I am really happy with the results, but it might be a while before I pay so much close attention to how much fabric I am using/stashing. I think I would rather just get down to it and sew, sew, sew!

My goal for this year is to sew more things for myself, at least one item a month, which I am keeping to so far, but that is another blog post!


Thursday, 27 December 2012

Maxx's Flat Cap

DSCF2431

This is Maxx's new favourite hat. I made it for him for Christmas, using Nicole Mallalieu's Flat Cap pattern. I had been thinking about making it, and whilst chatting with Amy (Badskirt) last Friday afternon, we decided to have a little (virtual) sew-along and immediately downloaded the pattern.

DSCF2430

Amy was a little lot faster at getting her hat together than me. I had three little ones to contend with and they were happily spilling things and having little disputes and wanting snacks and bandaids and doing the usual kid stuff. I did manage to get it all cut out and my mess cleaned up before Maxx got home from work. Because it was a secret Christmas gift, it was Sunday night before I got back to it (and finish it), after he went to bed.

DSCF2429

The hat is actually made from some furnishing fabric of some kind. I'm not sure exactly what it is, but I wouldn't recommend using it for a project like this again. The weave is actually quite loose, so it frayed really easily, which made for difficult sewing at times. My sewing machine even tried to eat it at one point!

Other than the fabric issues (oh, and the kids-being-around-issue) the hat came together fairly quickly. I think the next hat will probably only take me a couple of hours, now that I know what I am doing and since I will use some proper fabric that doesn't fall apart!

Monday, 3 December 2012

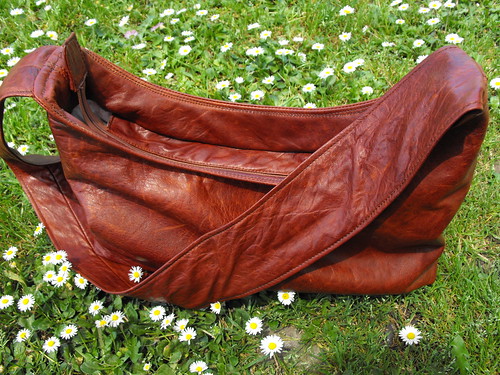
Antique Leather Hobo

DSCF2409

The other day, I set myself a twenty-four hour challenge to make Nicole Malllalieu's Hobo bag, using some beautiful antiqued, lambskin leather I had from NSW Leather Co. I had been thinking about making this bag for a while, and with a Christmas "do" to attend with a new dress that all my current bags clash with, it was at the front of my mind. Someone had said on Facebook, that they managed to put one together in about three hours, and although they hadn't used leather, I thought I should at least have a go. I mean, I had 24 hours and who needs to sleep? (Me! I do!)
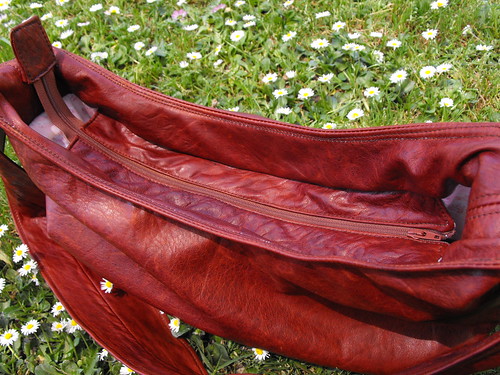
DSCF2410

Well, it wasn't to be. I managed to get most of the outer bag constructed and then ran into some trouble inserting the zip. Trouble included some problems with leather that is a little stretchy, and some thread-matching and tension issues. In hind-sight, if I was making this particular bag again, I would make the zip gusset entirely from leather.

Something that I have learned about my machine is that it really does like the upholstery thread. I can't seem to be able to adjust bobbin tension enough to cope with other thread thicknesses, and even so, it is difficult to balance the tension so that there is no top thread showing on the bottom or bottom thread showing on the top. So I headed to a nearby store to get some upholstery thread in a lighter colour so it wasn't too dominant on the underside of the fabric.
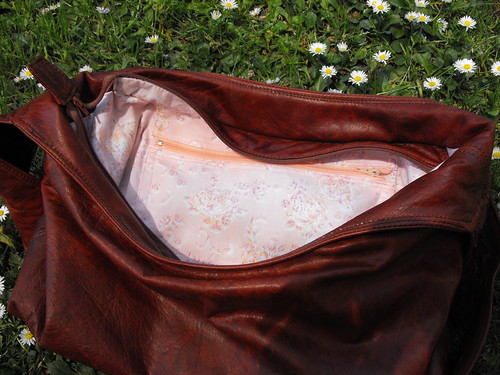
DSCF2411

I also found that the leather liked to stretch out a bit, so, combined with a non-stretchy lining fabric, it was a bit of work to get a nice, non-twisty zipper gusset going on. I found that going really slowly and carefully and using my new Clover clips, I was able to construct something that was acceptable. Switching from the zipper foot to the proper teflon foot, just for the stay stitching along the hidden edge of the gusset really helped. Actually, looking at the finished product, I am more than happy with it.
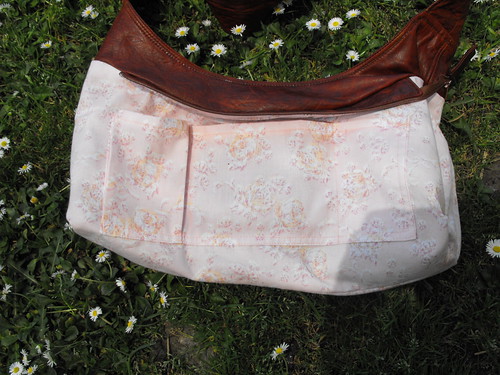
DSCF2413

I used both of the pocket options for the lining. There is a zippered pocket and also another pocket with a pleated mobile phone slot. I did this pocket back to front to Nikki's pattern so that the phone pocket was easily accessible. (I had the zipper pocket closest to my body and the phone pocket further away). If I was only doing this pocket, then I would do it exactly as per the pattern. I am really fussy about the direction of zips too. I like my zipper head at the front when the bag is closed, both for internal and external pockets.

Another little grievance I have with my industrial machine is the feed dogs are a little harsh on soft, lambskin leather and can leave nasty track marks. I learned this when practicing making straps when I made my Red Leather City Bag. When making the City Bag, I used tear-away stabiliser to protect the leather from the feed-dogs. I think it works fairly well, though I don't like the way the thread gets pulled when tearing away the tear-away. I thought this time I would use paper towel. I don't think I will do this again, as it is really tricky to remove paper towel fibres from under stitches. I have another idea that I might try next time.
DSCF2412

I love the wide strap on the bag. I made it exactly to the pattern piece, although I only did minimal top-stitching, just along each edge as I think it worked really well with the leather I was using and the over-all slouchiness of the bag. I didn't use any o-rings for this bag. If I did, I would have preferred brass ones and I didn't have any in my stash. I think this was a good decision for this particular bag, there would have been a lot of extra bulk where the straps are attached, which I don't think would have suited the relaxed style of this bag.

Over-all, I am pretty happy with this bag. Could I have made the bag in twenty-four hours? Possibly. I'm not really sure? I am guessing that I actually spent about twelve hours making this bag. Maybe more? I have little kids though, so finding twelve hours out of a twenty-four hour period of time is nearly impossible. Realistically, I would give myself a week, or at a bare minimum, a weekend to make this bag again out of leather. I could make it a lot quicker in quilter's cotton, but I cannot see myself making the entire bag in three hours.

Thursday, 29 November 2012

24 Hour Leather Hobo

Challenge: Hobo+Leather+24Hours. #canitbedone?

I have a new dress to wear to a Christmas function tomorrow night, but it has come to my attention that it doesn't go with any of my bags. So I'm going to have a bash at making a "You Sew, Girl!" Hobo bag from some leather that I have been saving for such an occasion. Can it be done?

Linking up with more Creative Peeps over here.

Thursday, 25 October 2012

23. Fob off your Christmas List

DSCF2295

I recently was lucky enough to test another "You Sew Girl" pattern, the USB Key Fob. I am currently using mine to house my USB stick for my Embroidery Machine. I don't even have to take the stick out of the fob to be able to use it, with the neat little hole in it, I can plug it straight in!

DSCF2296

This key fob is great for keeping your USB stick safe and sound as well as being easily identifiable. It would make a great addition to christmas stockings if you choose your fabrics and embellishments wisely. If you choose more masculine fabric, it would even make a suitable hand-made gift for a man. Because we all know how tricky it is to find suitable hand-made gifts for men and teenage boys.

DSCF2292

Pop a USB stick in there and your teens might like it to store their MP3s on or for schoolwork. Maybe you could pair it with an iTunes gift card? It would also make a great teacher gift if you do that sort of thing. You could pop some photos on the USB stick and give it as a gift for the grandparents for Christmas. It could even be personalised with the child's name. Or you could get them to draw a picture for Nanna using some fabric textas or crayons.... (mind going into over-drive here).

DSCF2293

Nikki gives you all the nifty tips and tricks you need to make this USB-key fob, and I am sure that you will use some of these tricks when making other things too. The best part is that you can down-load it right now and get cracking on your hand-made Christmas gift-list.

DSCF2300

How would you "giftify" a USB stick? Who would you give it to and how would you embellish it? Would you put stuff on the stick, or leave it empty for the recipient to do what they wish?

Saturday, 15 September 2012

Doe, a Deer...

DSCF2020

The main reason I started this hat sew-along was because I went to put Amélie's hat on from last year and it didn't fit. Amélie didn't care, she wore it anyway, on top of her head.

DSCF2026

I went looking through my stash and found this fabric with baby fauns and apples on it. It has been in my stash for years. I originally purchased it from Retromummy, back when she had her on-line store running. It's not quite pink, sort of slightly apricot and has been difficult to match with other fabrics. I decided to match it with the red in the apples and went with this red spot that I found at my local quilt shop.

DSCF2012

I made my hat using the Kids' Hat pattern from You Sew Girl. I trimmed the edges with some cute binding that I bought a while ago from The Haby Goddess. I could see that the hat required further embellishment, so I added a hat band.

DSCF2034

I think the hat-band really finishes it off. It is easily removed for washing and can be tied at the back or side, either loosely or in a bow.

SOLOMON SEWING

If you are thinking about joining in with my sew along, there is still plenty of time. Just push the button above to go to the sign up post. We are only half way through the month and already several beginners have finished their hats. Some of them have even finished TWO. I still want to get at least two more made. One for Liam and one for Noah. Let's see how we go...

More Hat Sew Along links here:


Blogging tips