Showing posts with label Amélie. Show all posts

Thursday, 13 November 2014

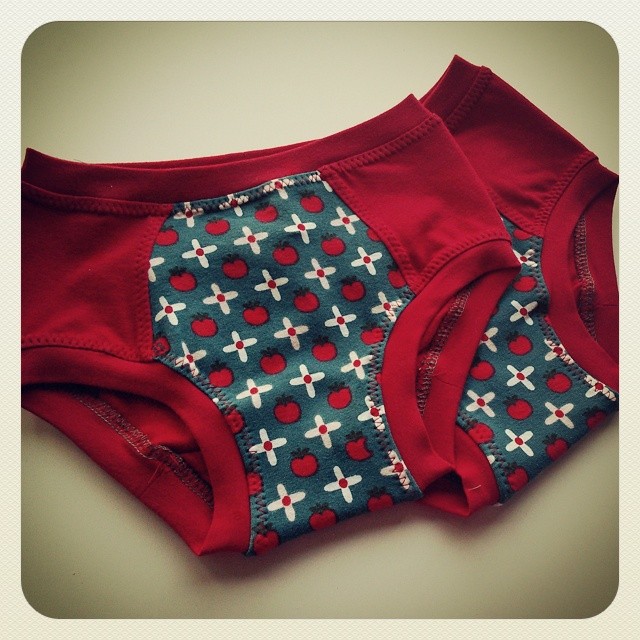
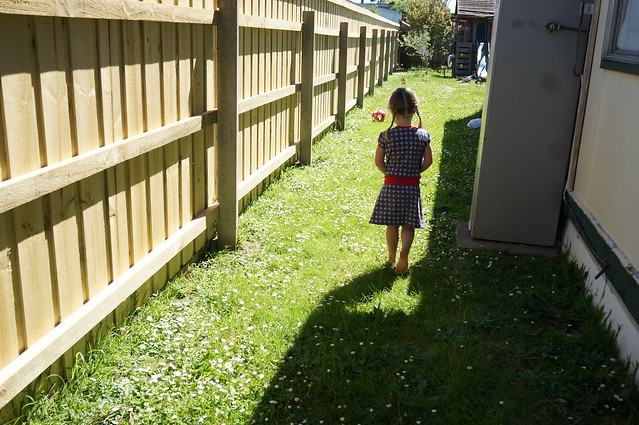
Apple Underpants

Oh, the cuteness!

Determined to use up every spare scrap of that delicious apple fabric from Amélie's Little Joey Dress, I made a couple of pairs of undies for Amélie, using the That*Darn*Kat underwear pattern. I normally would have matched the overlocking with the main fabric colour (red) but for some reason never bothered with these undies. I did the top stitching with a nice red zig-zag stitch, which I think is quite effective. You can see that I only needed a very small amount of pretty fabric to make these otherwise plain undies special. I really did use up all that apple fabric, I was left with only tiny slivers!

You can see previous undies I made using this pattern here. I love this pattern because the undies provide really good coverage. They are nice, comfortably snug fit around the legs and the crotch, unlike many shop-bought undies. Perfect for sitting cross-legged on the floor for kindy, if you know what I mean. There is no plumber's crack reveal either. If anything, they could be a little shorter in the waist.

Monday, 10 November 2014

Little Joey - Apples

Little Joey Text

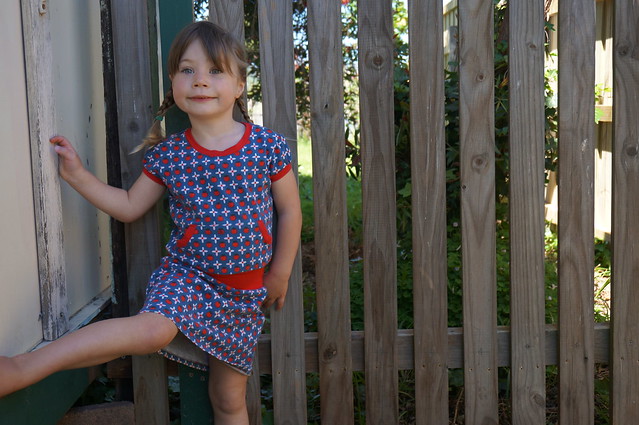
Some time ago, Toni from Make It Perfect emailed me and asked if I would like to test her new pattern, Little Joey. The dress looked so cute, I said "YES," and immediately ordered fabric from Crafty Mamas to put it together with. Crafty Mamas is my go-to shop for high quality stretch fabrics, and this Snow White themed apple fabric came in a Creative Pack with some coordinating dark grey and red fabric, some ribbon and a cute little bird iron on. I had my eye on that fabric pack already, and I knew that the Little Joey pattern was the perfect excuse for me to buy it.

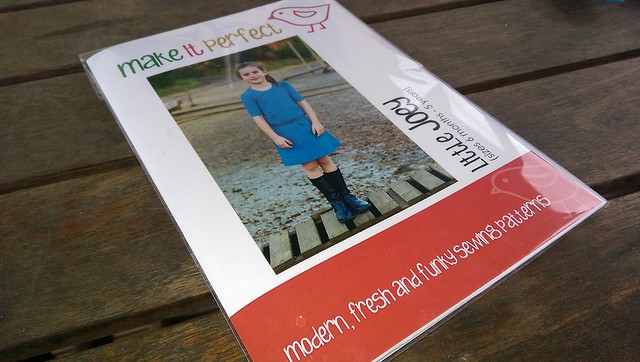
Make It Perfect - Little Joey pattern

Little Joey is a cute little jersey dress with a waistband and kangaroo pockets. This particular pattern is for little girls from six months to five years. There is also a Big Joey pattern for your Little Joey's big sister, aged up to about 10, and a Skippy pattern, perfect for mums on the go. I made the size four pattern and chose to make it with the short sleeves.

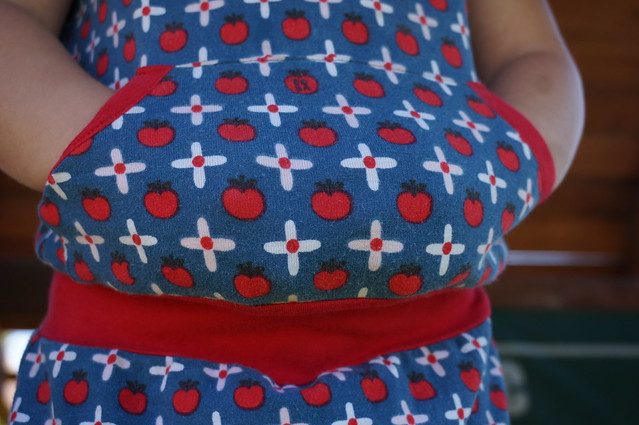
Little Joey Apples pocket

The fabric pack I had purchased only had 50cm of the apple fabric, and I was determined to make the pattern fit, despite the recommendation being for 110cm of main fabric. I think my piece was actually about 55cm or so, and I did make the skirt shorter to get it to fit. Something I did find odd about the pattern was that the bottom corners of the skirt come to a point, instead of being a neat curve. I trimmed these bits off before hemming. I did mention this to Toni in my pattern testing notes, but the final pattern was not changed.

Comfy Joey Dress

Whilst I would say that the fabric requirements are generous, I do recommend that you have a bit more than I did and it will be a less stressful exercise, especially if you wish to make a larger size, or long sleeves. Alternately, I could have had a grey bodice and ironed on the bird, but I am glad I persevered with making the apple fabric fit. I used some of the red coordinating fabric from the Creative Pack for the neck and sleeve and waist bands.

Little Joey back

I think Amélie's favourite feature is the kangaroo pockets, where she can store matchbox cars and all sorts of other treasures. I just can't go past those cute little puffy sleeves. The sleeves were a little bit tricky because there were no notches to match between the sleeves and the armholes, so there was a bit of guesswork involved there. Whilst I still think the Make It Perfect patterns could use a little polish, the pattern was easy to put together and the end result is a cute little dress, perfect for playing in and easy to care for - no ironing!

Little Joey Pockets

Monday, 27 October 2014

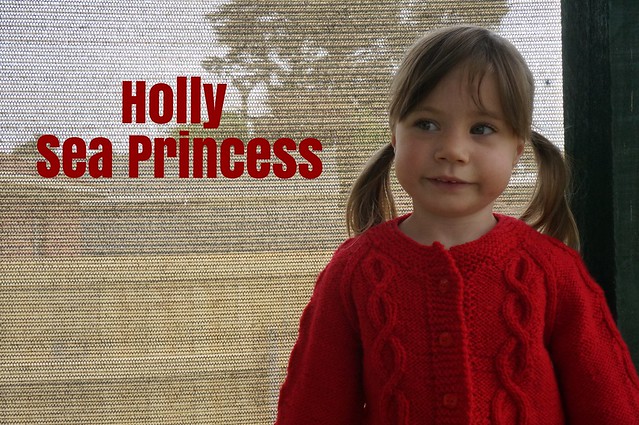
Holly Sea Princess

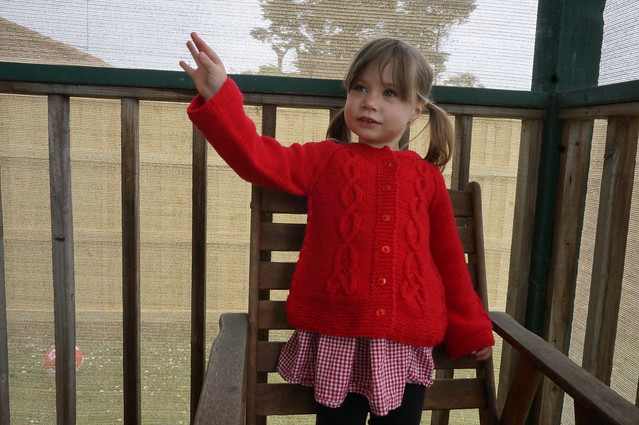
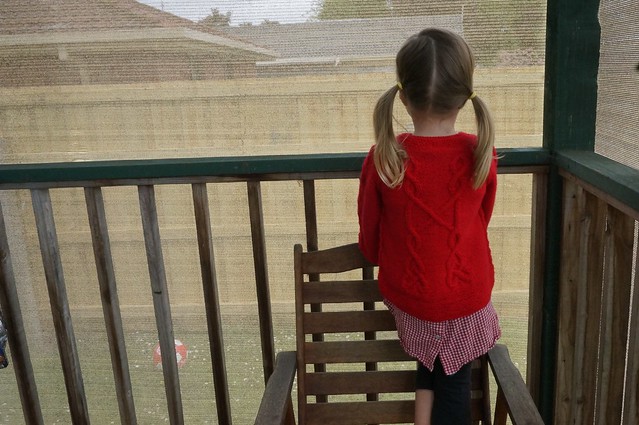
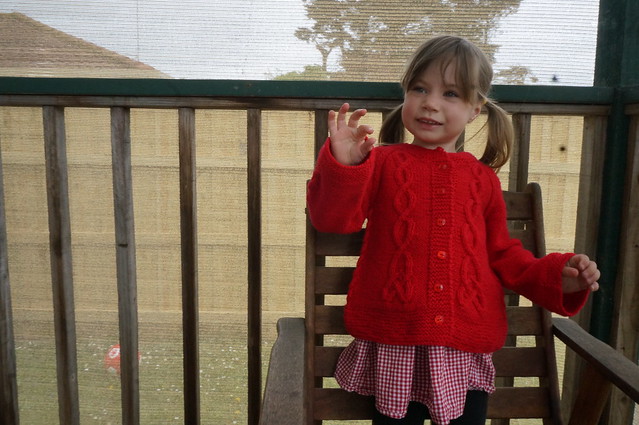
Holly Sea Princess Cardigan

Kids' Clothes Week just ended and whilst I didn't do much in the way of sewing for my kids, I did get some knitting done. I spent at least an hour a day for the first four days of the week, and finally completed this Sea Princess cardigan for Amélie. The Sea Princess pattern by Elena Nodel, is available from Ravelry, and I recently discovered it is also on Craftsy*.

Holly Sea Princess

The pattern comes in sizes from six months through to nine years, and has quite a few options including double or single breasted, different sleeve lengths and shapes, as well as variations on how elaborate the cabling is. I chose long sleeves with the elaborate cables and just one row of buttons. I particularly love the detail on the back.

Holly Sea Princess back

I knitted the cardigan on my Knit-Pro interchangeable needles from the top down. You knit it all as one piece, so there is no stitching up at the end. It starts below the neckband, and you knit front panel, shoulder, back panel, shoulder, front panel. You keep knitting, back and forth with some increases until you get to the underarm point, where you slip a bunch of stitches off onto a stitch holder for the sleeves, and then join the front and back panels together at the sides. There is a twisty cable that runs down the side "seams" between the front and the back. After you have completed this, and bound off at the bottom, you go back and knit the neckband, and then you knit the remainder of each sleeve in the round. All there is to do after casting off is to tidy up a little under the armpits and weave in all the ends. You can save yourself some trouble by knitting half of those ends in as you go. One of the fun things about knitting on interchangeable needles is that it is easy to try on as you go.

Sea Princess

I used Bendigo Classic 8-ply in Holly to knit this cardigan. It comes in 200g balls, and I used about one and a half balls, leaving me 123g of yarn to knit something else. I might mix it up with some grey and knit some stripy hats. We will see. The yarn is only $12 a ball, so quite a reasonable price for good quality yarn.

Sea Princess - button

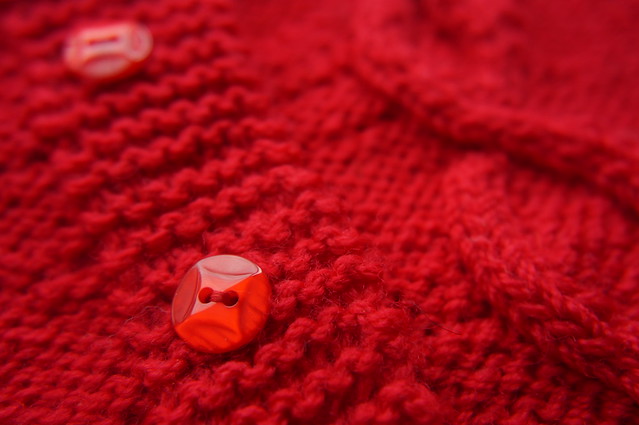
When I finished knitting, Amélie and I went to the shop and chose some buttons. I picked up some that were red with teddy bears on them, but she wasn't interested in those. It is clear that she has more sophisticated taste than that.

*Affiliate link

Saturday, 29 March 2014

Another Shirred Dress

Amélie Shirred Dress

One of my favourite things to make for Amélie is a shirred dress. They are relatively quick and easy to make, and fit for a long time. A couple of her older ones have been worn as tops as they got too small to be dresses anymore.

Shirred dress - full length

You don't need a pattern, just a rectangle of fabric. There is very little wastage as I use the whole width of the fabric and just square it up. This particular dress was extra thrifty as I purchased the fabric (poly-cotton) which was already cheap, on sale and I used (Spotlight) vouchers as well.

Do you have any easy things that you like to make over and over for your kids? Particularly pattern-free things?


Tuesday, 11 March 2014

Doe, A Deer

Doe, a Deer


From the moment I saw them, I knew I had to have this embroidery design pack from Embroidery Library. The embroidery pack is called Springtime Frolicking Friends and comes in three different sizes. I chose to go with the medium size which I think is quite large, as it turns out. It's the perfect design to pretty up a cheap, plain t-shirt. The design pack has the deer featured with a bunch of other little forest friends, including a rabbit and a skunk (remind you of anyone?). The design I used stitched out beautifully, without any problems.

A female deer


I hooped the t-shirt and the stabiliser together - I used a cut-away stabiliser, rather than a tear-away. The tricky part for me, was trying to keep the rest of the t-shirt out of the way, which I did using safety pins, bulldog clips and Clover Wonder Clips. The t-shirt I used was a size 3, I don't think I would attempt to do this on a smaller t-shirt, it was really quite fiddly, but I got it to work.

Stitching out the Deer


Have you got an embroidery machine? Purchased any good designs lately? Any suggestions as to easier ways to hoop up a small child's t-shirt?

Thursday, 27 February 2014

The Twirliest Twirly Skirt

Redondo Collage

I was disappointed when I bought the book "Sewing Clothes Kids Love" and realised that this pattern was not included. Sure, there is a great picture of a rainbow Redondo in one of the first few pages, but sadly, no pattern. It is still a great book, though - I promise! So, when Lisa of Crafty Mamas, linked to this pattern in her shop from Facebook a couple of weeks ago, I was sold. It was probably less than two minutes after she posted the link, that I was checking out my purchase on Paypal. This was one of those patterns that I had wanted for a while.

Redondo Hem Detail

Once I had the pattern in my hot little hands, I went stash diving and found some of this West 22nd Floral Delight, that I purchased from Spotlight about five years ago. I just managed to squeeze this skirt out of what I had with barely a scrap to spare. I popped into my LQS and found some ric-rac trim to add to the edges, using this great little tutorial. There is quite a bit of hem to trim, about five metres all up. I used the blind hem on my sewing machine and it was pretty slow going, but I love the final result.

DSC01175


Saturday, 15 February 2014

Gingham Puppet Show Shorts

Gingham Puppet Show Shorts

I made these shorts back before Christmas, to go with Amélie's "Hollywood Cherise", but have struggled to get a photo of them on her. They get worn heaps, sometimes with the dress and sometimes with a t-shirt. The pattern is the Oliver + S Puppet Show Tunic and shorts pattern, which I think is possibly the cutest shorts pattern ever. You can get the pattern as a digital download from here.

You can see other items I have made using the pattern here, here, and here. I also did a little tutorial to get that perfect placement of the pockets which you can see over here.


Thursday, 16 January 2014

Woodland Sailor Shorts

Woodland Sailor Shorts and t-shirt

I made these CUTE shorts for Amélie, back at the end of November. The fabric is Woodland Fairies by Natalie Lymer of Cinderberry Stitches for Lecien. I have had this in my stash for a little while, waiting for the right project to come along and here it is. The pattern I used is the Sailor Shorts pattern from the Peek-a-boo Pattern Shop on Etsy. If you've never shopped on Etsy before, you can use this link to get $5 off your first purchase. In the interests of full disclosure, if two people use this link, I also get $10 off my next Etsy purchase. You must be new to Etsy for the link to work.

If you are making these shorts, I would recommend going up a size to usual, especially if your child is still in nappies. Amélie is not wearing a nappy in these pictures, but when she was wearing one, it poked out the top at the back. I am not sure if the "T" in the sizes actually means they are sized for a nappy or not, but Amélie still wears mostly size two pants, and these were very snug with the nappy on.

Woodland Sailor Shorts

I feel that the construction of the band across the front (the short waistband) was more complicated than necessary. The seam allowances are all encased, which means there is more bulk than necessary in those edges that are just going to be covered with bias binding anyway. A pattern piece with the curved edges and button holes marked would be preferable to instructions where you cut a rectangle and add the curves yourself. If the top edge was open, rather than folded, there would be no messing about with trying to catch an edge in your topstitching. Much quicker, less bulk and no curve clipping (not that there is any mention of curve-clipping!). I would also suggest some interfacing be applied to this waistband, especially since there are button-holes. In addition to this, some dots to indicate the position of buttons on the front would be nice as would notches in some of the seams.

Woodland Sailor Shorts and t-shirt 2

Having said all of that, these really are a cute little pair of shorts and it was still a pretty good pattern with great instructions and clear photos at each step. I would still recommend this pattern and I am sure to buy more from this designer. I did an extra little alteration myself, by adding adjustable buttonhole elastic to the waistband. Instead of stopping at the side seams (the elastic in the pattern only goes across the back), I put some buttonholes in the ends of the long waistband (hidden behind the front, short waistband) and threaded the elastic right the way around, making the shorts adjustable. I did this mainly because I was making size three and thought they might need to be adjusted tighter for Amélie.

If you want to make these shorts, and you haven't used bias binding before, the picot edged bias is really easy to use. The picot edge keeps that fold in the middle, so catching the edge of the bias on the back when you topstitch on the front is far easier than with regular bias, particularly around the curves.

Oh, I nearly forgot to mention the t-shirt she is wearing! It was a $2 plain t-shirt from K-Mart that I appliquéd with a heart shape from my scraps using a little Steam a Seam, some cut away on the back and a machine blanket stitch. It only took me a few minutes and now she has a cute t-shirt to match her shorts.


I used about half a metre of fabric to make these shorts, so two fat quarters of fabric, SYST13 Running totals: in = 140, out = 270, total = -130

Have you ever purchased a pattern from Etsy? Any you recommend?


Tuesday, 14 January 2014

Hollywood Cherise

Hollywood Cherise - Amélie

The Hollywood Cherise features in the Summer 3/2012 issue of Ottobre. The main part of the dress is gathered onto a yoke and as the little cap sleeves are part of the rest of the dress, there are no sleeves to sew, making this a quick dress to put together. I made this gingham version for Amélie around the end of November or start of December.

Hollywood Cherise - front

I omitted the pockets from the pattern.The instructions suggest cutting them on the bias, but I had trouble maintaining the nice square shape when I did that, so ditched them altogether. Most likely they would only end up full of sand at this time of year, anyway.

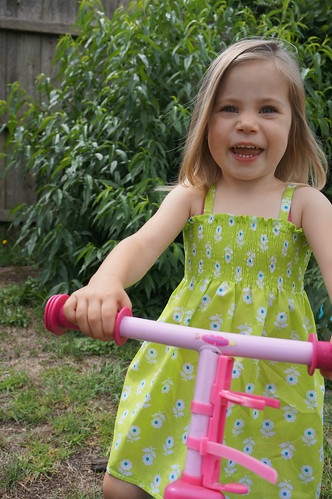
Hollywood Cherise - bike

As you can see from the photos, it is a comfortable dress to wear. Amélie has no trouble playing in it, and it is perfectly breezy for a hot, summer day. It can also be made shorter, if you like, so it can be worn with pants or shorts as a tunic, rather than the full-length dress.

Hollywood Cherise - back

The final detail was the pearl snaps I added to the back of the dress. Easy to do up and undo, and a perfect compliment to the classic red gingham fabric I used. I love this pattern, and Amélie seems to love wearing it, so I might revisit it some time with some different fabrics.


The Hollywood Cerise used about three fat quarters of fabric from my stash. The Christmas Tree Skirt in the previous blog post used approximately 10 FQs of fabric, but I bought six FQs of fabric and used the rest from my stash. I also purchased 15 FQs of fabric to make myself a top and a further 12 FQs to make Maxx a shirt. Why, oh why does this feel like a major confession?! SYST13 Running totals: in = 140, out = 268, total = -128

Tuesday, 30 July 2013

Attitude

DSC00145

I had a post not quite finished that I meant to finish and publish BEFORE Kids Clothes Week but never got around to. It's pretty irrelevant now. I was busy in the lead up to mine and Liam's birthdays and so it never got finished. I will maybe do a post later about the birthdays, but for now I will tell you what I did during Kids Clothes Week.

DSC00122

During Kids' Clothes Week, I made this Oliver + S Music Class blouse and skirt. I didn't get anything else done, but I'm okay with that. I started with the skirt. I love the little pleats, and the pockets are a clever design. Amélie calls it her Spotty Wot skirt, because it is spotty. The skirt was pretty quick to make, a couple of hours at the most.

DSC00120

Then I made the blouse. You have to be pretty accurate with those pin-tucks, or the yoke won't fit onto the rest of the bodice properly. They are a really beautiful detail. If pin-tucks seem to fussy or fiddly, you could easily gather or add small pleats instead.

Oliver + S Music Class blouse and skirt

As you can see, I messed up when I cut out the blouse. I went to lots of trouble getting all the dots to line up when I folded my fabric before I cut it out. I actually placed the fabric up against a window to line up the dots and placed pins through them to force the fabric to be symmetrical. I am glad I did, as you can see that the dots still do form a neat row, but I should've placed the centre front down the middle of a row of dots. What I did instead, was to place the fold line on the middle of the dots. Maybe I worry about these things too much? If the dots were smaller, it wouldn't bother me so much, but those half dots that don't line up across the diagonal really annoy me.

DSC00152

I also agonised over the buttons. In the end I chose the clear butterfly buttons because Amélie likes butterflies (flutter-bys) and I wanted them to be clear. My usual pearl snaps would have been too attention grabby for this blouse, I wanted the spots to be the feature. I also considered red buttons, along with some red piping on the yoke seam and on top of the skirt pleats, but then thought that if I didn't then the blouse or skirt could be worn with other (probably pink) clothes. Some red tights and a cardigan and maybe ribbons in her hair could do the same job.

Oliver + S Music Class blouse and skirt

I was having a really bad time with my button holes on this blouse. I did have a bit of trouble with the bulk in the seams either side of the top button hole. They were stopping the buttonhole attachment from moving smoothly as the seam moved over the edge of the sewing machine. In hind-sight, I think if I had put the extension table on, that may have over-come this problem. I really can't explain why I had to unpick and re-stitch the buttonhole second from the bottom though. Once I accidentally tapped the buttonhole lever by mistake (distracted by a child), another time it seemed to not be down all the way, so it didn't work, another time it went completely wonky... I think I redid that buttonhole maybe 5-6 times? Ugh! Well, I got there in the end...

To explain the odd title to this post:

Oliver + S Music Class blouse and skirt

I took these photos as everyone was on their way out to the car for school and kinder. Amélie really wanted me to take photos of her holding up her (manky) blanky.

Oliver + S Music Class blouse and skirt

Did you join in with Kids Clothes Week? Have you blogged about it yet? What did you make?


SYST13: I managed to squeeze this pattern into six fat quarters from my stash
Running totals: in = 180, out = 76, total = +104

Wednesday, 3 July 2013

My First Beanie

Amélie's Beanie - portrait

Inspired by a free Cleckheaton knitting pattern from a Spotlight promotion, I decided I was going to knit a beanie. I've never knitted a beanie before, so of course I wanted to give it a go. There were two problems with the pattern from Spotlight. The first problem was that the pattern was too big for Amélie, and secondly, it had a seam up the back. I prefer to avoid seams in knitting where ever I can and love to put my circular needles to good use.

Amélie's Beanie


So the search began for a beanie pattern that came in toddler sizes and could be knitted in the round with 8ply yarn. Of course, Ravelry is the place for all things knitty - I am NoahsMummy on there if you want to seek me out. There were lots of free patterns to choose from, but I eventually settled on this Child's Self Striping Hat. Only I didn't go for self-striping, I decided to work in stripes using different coloured yarn, inspired by the original pattern I had seen.

To keep Noah busy (because he needs to be kept out of trouble), I set him to work making me a pom pom. The pom pom is probably a bit on the big side (I guess that depends on how you like your pom poms) and maybe even a little bit too dense, but both of those are my fault.


Amélie's Beanie - side

The stripes were a bit tricky. When you knit with circular needles, you really are knitting a spiral. This means that each time you start a new colour there is a jump, or a jog. To overcome this, I found a youtube tutorial. (I love YouTube for knitting tutorials). Basically, you start the new colour, as normal and start knitting. Once you get back to the start of the round, you pick up the right leg of the stitch beneath, to pull it up in line. You can see from the picture above, that I did struggle to get this right, but I worked it out by the time I got to the top of the beanie.

Amélie's Beanie - bike


I may just be a little bit addicted to knitting beanies. They are a great little project and knit up fairly quickly. Perfect for in front of the television on these cold wintery nights, and really good for instant gratification. The stripes could be a great way to use up scraps of left-over yarn as well.

Do you have a favourite knitting project that you like to make?

Sunday, 9 June 2013

Kokeshi Tea Party

Kokeshi Tea Party

I finished the Oliver + S Tea Party dress last weekend. I bought the pattern from Duckcloth, who are closing down their online store. Their Oliver + S Patterns are 40% off. This only cost $15, which is a bargain for such a well drafted pattern.

Kokeshi Tea Party - texture

I originally purchased this fabric from Spotlight, quite some time ago. I loved it because of the Japanese Kokeshi Dolls and the slubs give the fabric awesome texture. I kind of wish I had bought a co-ordinating print when I got it, but I didn't have any specific plans. I have a feeling there was only black there at the time, which is probably why I never bought it. I have seen red and I think navy as well. I am sure if they had those I would have got some?

Kokeshi Tea Party Dress

So once I decided that this was the fabric I was using for this dress I went off to my local quilt shop to find something to co-ordinate. I really wasn't sure if they would work or not. I really liked the way the red, floral fabric matched the Kokeshi Doll fabric, but wasn't sure about the purple. The purple against the red was a little scary, but there were little hints of purple in the Kokeshi fabric that I wanted to exploit. In the end, I decided to just go with it.

Kokeshi Tea Party Dress

I hadn't really planned what to do about buttons. I saw there was two buttons in the list of items that I would need to complete the dress, but for some reason, I didn't think of them as being important. I envisioned some decorative buttons somewhere, completely forgetting that I would need them for the straps. I don't know what I was thinking? Anyway, I remembered that I had a little pack of self-covered buttons from Pack It In that would do nicely, especially since I had the ideal fabric to use, with tiny motifs that fit the buttons perfectly. I put a bit of interfacing on the back to help reduce the shine-through from the button. I KNOW I have seen this suggested on a blog somewhere, but I can't remember where??? If someone knows, can they please tell me so I can credit it? The blogger may or may not have suggested wadding as well??

Kokeshi Tea Party - purple button

I love these little buttons so much, I may need to make some more...

Kokeshi Tea Party - Orange Button

For this project, I used some fabric from my stash as well as some that I purchased.
SYST13 Running totals: in = 176, out = 58, total = +118

Monday, 29 April 2013

Amélie's Jump Rope Dress

Slide

As part of Kids' Clothes Week I decided to make Amélie the Jump Rope Dress by Oliver + S. I bought the pattern as a download late last year and it has been sitting in my to-do pile ever since. There were lots of different fabrics in my stash that I would have loved to use for this dress, but it required more fabric than usual. Most things I have about 1m of, but I needed about 1.5m for this dress as the skirt is quite full.

Pocket

There are some awesome details in the dress. I love the pockets. I was initially thinking that navy or red buttons would be nice, but finally decided on pearl snaps. Pearl snaps may just be my "thing". I love the way they look and they do make getting clothes on and off much easier.

Sleeve tabs

I also love the little tabs that hold up the sleeve cuffs. For the pockets and the sleeve tabs, I just used a snap, the way you would use a stud - with just the female part on the back. They don't need to come undone.

Swing

The dress used about 1.5m of fabric, which is equivalent to six fat quarters.


SYST13 Running totals: in = 168, out = 44, total = +124
Blogging tips