Monday 17 November 2014

Made for Me - May Houndstooth Skirt

Houndstooth skirt under an hour.

Please excuse the grainy instagram picture, I am still playing mega-catchup on the blog. I picked up this houndstooth fabric from Darn Cheap Fabrics in Glen Huntley, early this year. It wasn't from the $2 table, it was about $$7/m. I used my self-drafted pattern that I made my chevron skirt from.

Whilst the fabric is a stretch, the recovery isn't great. If I was doing it again, I would put elastic in the waistband. It stays up, but gets looser throughout the day. If you are wanting to make yourself a stretchy a-line skirt that has a self-waistband, then definitely go for something that has good recovery. Something with a little lycra or spandex would be ideal. These skirts come together quickly and easily and are a great addition to the wardrobe as they look great and are comfortable to wear.

Thursday 13 November 2014

Apple Underpants

Oh, the cuteness!

Determined to use up every spare scrap of that delicious apple fabric from Amélie's Little Joey Dress, I made a couple of pairs of undies for Amélie, using the That*Darn*Kat underwear pattern. I normally would have matched the overlocking with the main fabric colour (red) but for some reason never bothered with these undies. I did the top stitching with a nice red zig-zag stitch, which I think is quite effective. You can see that I only needed a very small amount of pretty fabric to make these otherwise plain undies special. I really did use up all that apple fabric, I was left with only tiny slivers!

You can see previous undies I made using this pattern here. I love this pattern because the undies provide really good coverage. They are nice, comfortably snug fit around the legs and the crotch, unlike many shop-bought undies. Perfect for sitting cross-legged on the floor for kindy, if you know what I mean. There is no plumber's crack reveal either. If anything, they could be a little shorter in the waist.

Monday 10 November 2014

Little Joey - Apples

Little Joey Text

Some time ago, Toni from Make It Perfect emailed me and asked if I would like to test her new pattern, Little Joey. The dress looked so cute, I said "YES," and immediately ordered fabric from Crafty Mamas to put it together with. Crafty Mamas is my go-to shop for high quality stretch fabrics, and this Snow White themed apple fabric came in a Creative Pack with some coordinating dark grey and red fabric, some ribbon and a cute little bird iron on. I had my eye on that fabric pack already, and I knew that the Little Joey pattern was the perfect excuse for me to buy it.

Make It Perfect - Little Joey pattern

Little Joey is a cute little jersey dress with a waistband and kangaroo pockets. This particular pattern is for little girls from six months to five years. There is also a Big Joey pattern for your Little Joey's big sister, aged up to about 10, and a Skippy pattern, perfect for mums on the go. I made the size four pattern and chose to make it with the short sleeves.

Little Joey Apples pocket

The fabric pack I had purchased only had 50cm of the apple fabric, and I was determined to make the pattern fit, despite the recommendation being for 110cm of main fabric. I think my piece was actually about 55cm or so, and I did make the skirt shorter to get it to fit. Something I did find odd about the pattern was that the bottom corners of the skirt come to a point, instead of being a neat curve. I trimmed these bits off before hemming. I did mention this to Toni in my pattern testing notes, but the final pattern was not changed.

Comfy Joey Dress

Whilst I would say that the fabric requirements are generous, I do recommend that you have a bit more than I did and it will be a less stressful exercise, especially if you wish to make a larger size, or long sleeves. Alternately, I could have had a grey bodice and ironed on the bird, but I am glad I persevered with making the apple fabric fit. I used some of the red coordinating fabric from the Creative Pack for the neck and sleeve and waist bands.

Little Joey back

I think Amélie's favourite feature is the kangaroo pockets, where she can store matchbox cars and all sorts of other treasures. I just can't go past those cute little puffy sleeves. The sleeves were a little bit tricky because there were no notches to match between the sleeves and the armholes, so there was a bit of guesswork involved there. Whilst I still think the Make It Perfect patterns could use a little polish, the pattern was easy to put together and the end result is a cute little dress, perfect for playing in and easy to care for - no ironing!

Little Joey Pockets

Monday 27 October 2014

Holly Sea Princess

Holly Sea Princess Cardigan

Kids' Clothes Week just ended and whilst I didn't do much in the way of sewing for my kids, I did get some knitting done. I spent at least an hour a day for the first four days of the week, and finally completed this Sea Princess cardigan for Amélie. The Sea Princess pattern by Elena Nodel, is available from Ravelry, and I recently discovered it is also on Craftsy*.

Holly Sea Princess

The pattern comes in sizes from six months through to nine years, and has quite a few options including double or single breasted, different sleeve lengths and shapes, as well as variations on how elaborate the cabling is. I chose long sleeves with the elaborate cables and just one row of buttons. I particularly love the detail on the back.

Holly Sea Princess back

I knitted the cardigan on my Knit-Pro interchangeable needles from the top down. You knit it all as one piece, so there is no stitching up at the end. It starts below the neckband, and you knit front panel, shoulder, back panel, shoulder, front panel. You keep knitting, back and forth with some increases until you get to the underarm point, where you slip a bunch of stitches off onto a stitch holder for the sleeves, and then join the front and back panels together at the sides. There is a twisty cable that runs down the side "seams" between the front and the back. After you have completed this, and bound off at the bottom, you go back and knit the neckband, and then you knit the remainder of each sleeve in the round. All there is to do after casting off is to tidy up a little under the armpits and weave in all the ends. You can save yourself some trouble by knitting half of those ends in as you go. One of the fun things about knitting on interchangeable needles is that it is easy to try on as you go.

Sea Princess

I used Bendigo Classic 8-ply in Holly to knit this cardigan. It comes in 200g balls, and I used about one and a half balls, leaving me 123g of yarn to knit something else. I might mix it up with some grey and knit some stripy hats. We will see. The yarn is only $12 a ball, so quite a reasonable price for good quality yarn.

Sea Princess - button

When I finished knitting, Amélie and I went to the shop and chose some buttons. I picked up some that were red with teddy bears on them, but she wasn't interested in those. It is clear that she has more sophisticated taste than that.

*Affiliate link

Monday 20 October 2014

Winter Flat Cap

Flatcap

When I made Maxx's coat, I had some leftover fabric, so I made him a matching flat-cap using Nikki's "You Sew, Girl! Flat-cap" pattern. I cannot believe it has been almost two years since I made his last flat-cap. This one is warmer for winter than the last one.

Despite the heavier fabric, this hat was much easier to put together than the last one was, and sewed up in no time. I also have a couple of these cut out ready for the boys.

Thursday 16 October 2014

"Well, hellooooo there!"

Hello!

said the giraffe, "Please do come in!"

I've had this post sitting in my drafts for a year, and just now, I saw that my friend Rachel had posted her about the quilt a year on, and thought I should finally share this.

Some friends and I secretly made our friend Rachel a quilt for her new baby. We started not long after she announced her pregnancy, so whilst she was busy baking a beautiful baby, we were conspiring to make him/her a beautiful quilt. The block above is the one that I made. AJ is the real hero, she put all those very different blocks together and made them into a beautiful quilt.

Monday 13 October 2014

Poor, Neglected Maxx

Albion Coat Profile

Maxx always seems to miss out. The truth is that men's clothes tend to require more time and more fabric in less exciting colours. The end result, though, is always worthwhile, and when I do make things for him, he really does appreciate it. If he wasn't into hats though, he wouldn't get much.

It took me ages to find fabric to make this Albion coat. I had the pattern in my hands for some time before I was able to find suitable fabric. Having said that, I can't say that it was particularly suitable. The fabric was from Spotlight, and I would suggest that unless you are planning to make a heavy, army style blanket, then maybe bypass it. Maxx assures me that the coat is comfortable, but it is very heavy. Almost 3kg. I can't say I was overly impressed with the range of wool fabric that Spotlight had, considering it was meant to be on sale. There was a total of 6 bolts there, three of which were light grey (two the same with sparkles, the other without), this olive coloured one, a dark green plaid and white. So olive it was, and lucky it's a colour he likes. I was happy to find a matching bemsilk to line it with. The pattern suggests flannel lining, but with fabric this heavy, it would be too much. Plus, bemsilk makes it easy to slip over other clothes.

Albion Coat Front

So, 3kg of coat is quite a bit to be lugging around the sewing machine, but I powered on. Since it was a birthday present, the coat was made mostly in secret, whilst Maxx was at work. I encountered some real difficulty when it came time to sew on the toggles. Large bulky coat needed to be able to be turned around under the harp of my machine, which was quite a squeeze. The weight of the coat threatened to drag my domestic sewing machine right off the table whilst I sewed, so it was hard yakka. There was much unpicking and swearing and in the end I got there, with the help of my trusty fabric glue pen, and my industrial sewing machine (with it's heavy table, and bigger harp) and they look fabulous! The toggles were made by hand, using leather scraps in just the right colour from my stash. I feel that the kits with the black toggle cover things would not have suited. I used a letter D from my big box of biscuit cutters as a template for the toggle covers. I managed to find some cord in just the right colour at Clegs in the city when I was there for Nikki's Book Launch, and the toggles themselves were from Spotlight.

DSC01720

I had originally intended to use buttons to attach the hood and sleeve tabs, but decided that it was unfair to expect my sewing machine to sew buttonholes into that bulky fabric and went with some brassy jeans snaps instead. I added some to the pocket flaps as well, for good measure. As well as being hardwearing, and looking fabulous, the jeans snaps were a much more affordable choice. Many of the buttons that I liked at Spotlight were $6 each. It would have cost me almost $50 for buttons (not including toggles). How ridiculous!

DSC01711

Apart from fabric woes, the pattern itself is pretty awesome. There are some great details, and whilst the pattern is quite extensive compared to the regular commercial patterns, there are even more great hints and tips on the sew-along. I also have the Walden Negroni pattern waiting for me to make Maxx a shirt (one day, I promise!) and I must say, they are the most attractively packaged patterns I have ever bought. I should also add that I am super impressed with my service from Sew Squirrel so far, my patterns have been posted to me super-quick. The Negroni pattern was ordered on a Saturday morning, was posted that afternoon and arrived Monday in rural Victoria!

Monday 6 October 2014

Made for Me - April Batwing Top

DSC01437

I originally made New Look 6648, view A in January, this time I decided to make view B with the batwing sleeves which is more suitable for the cooler weather. This time the fabric was from the $2 rack at Darn Cheap Fabrics in Glen Huntly. I was lucky to have found it, as the fabric was rolled with the "pretty side" facing inwards. The outer side, with the pretty sparkles was hidden inside the roll.

DSC01257

I encountered an interesting problem when laying out the pattern. My fabric was only about 130cm wide, which is wide compared to many woven fabrics, but most stretch fabrics are closer to 150cm. It seems I wasn't the only one who had issues with the width of the fabric. When I made a little post on facebook about it, it turned out that Lara was also making a (different) top, using the exact same fabric! With the batwing style sleeve, the front and back pattern pieces are quite wide. When I laid this pattern out, I realised it was not going to fit. I decided to cut the sleeves a bit short, and add cuffs to the ends. I made the cuffs the same way that the lower band is made, with gathered seams.

DSC01438

One thing that I do find a bit irritating with the top I made in January, is that even though I made the neck opening narrower and deeper, it is still "a bit flashdance" and falls off my shoulder from time to time. I wanted to avoid this and really brought the neckline in on this top. Then I did my neckband differently to the instructions and mitred the centre front instead of the way the pattern has you do it. I feel I did make the neckband a little short, as it brought in the neckline even more, it is very modest, but being an autumn-winter top, this keeps me warmer - better than having a top that falls off the shoulders when it's freezing outside.

Monday 29 September 2014

Around the World Bloghop

Hello! I haven't been in here for aaaages. My fellow blogger, and crafty associate, Amy Badskirt has kindly given me the kick up the bum I needed, and nominated me to participate in a little blog hopping fun. Basically, I answer a few questions about my creative process so that you can get to know me a little better, and then I tag a couple of people and get them to do the same. then we can all get to know each other a little better. If you are interested, you can check out Amy's post here, and follow back up to the beginning, or you can follow any of the links off to check out the other nominees' answers. You can see who my lucky victims are at the end of this post.

Delicious Jersey knits

What am I working on?
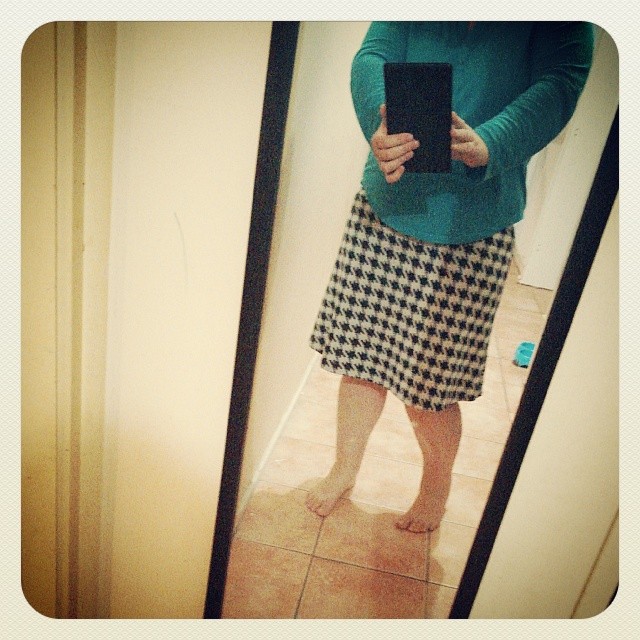
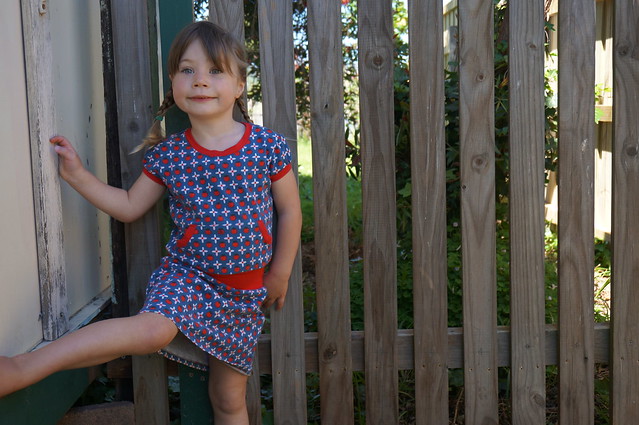
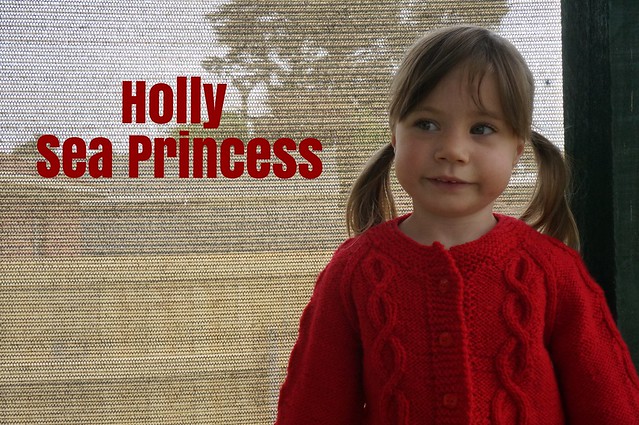
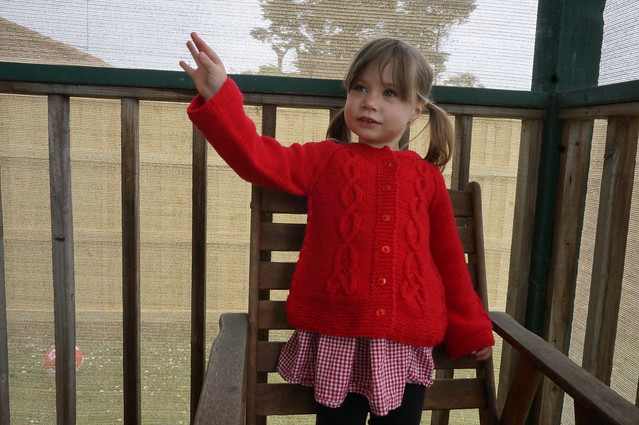
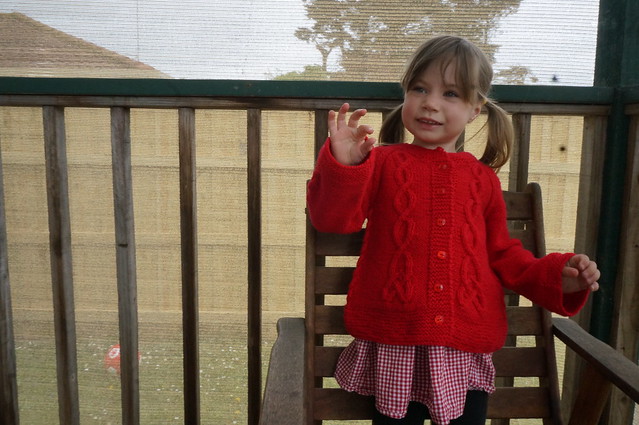
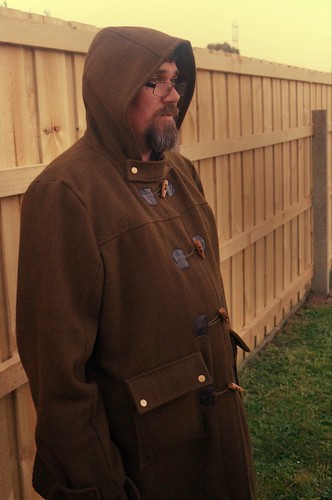
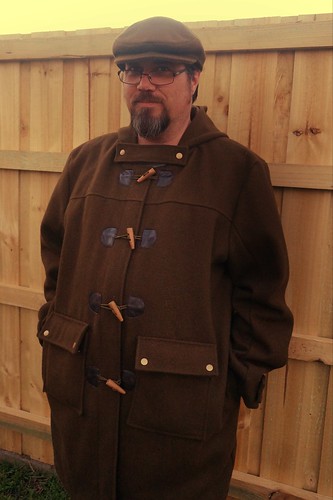
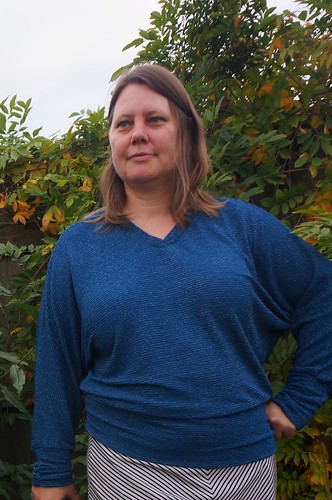
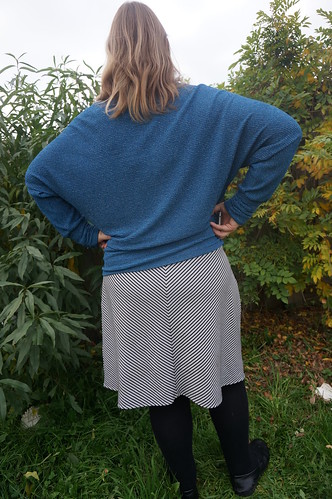
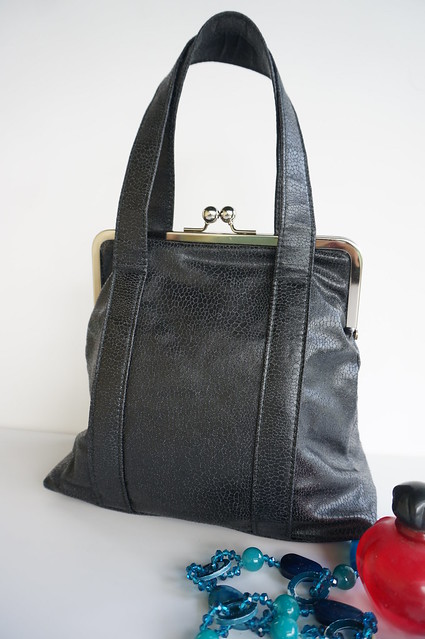
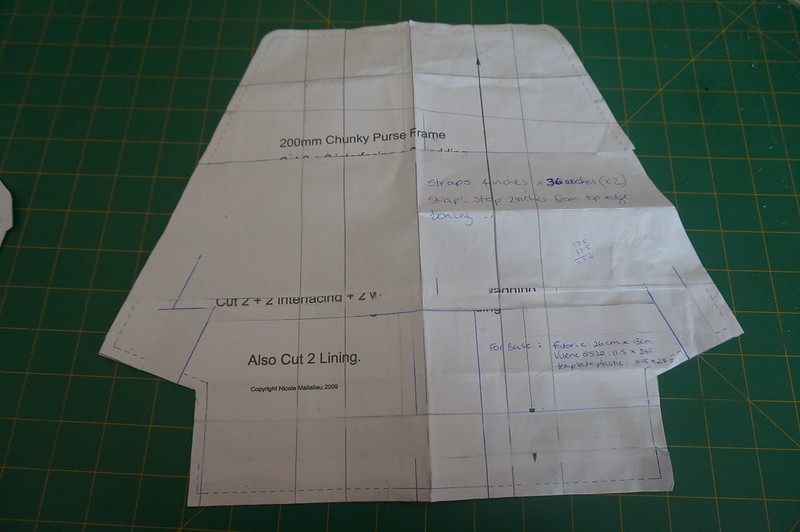
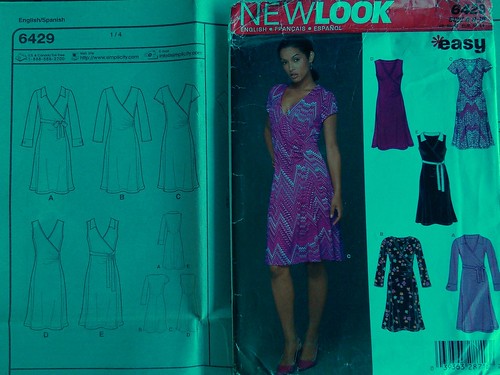
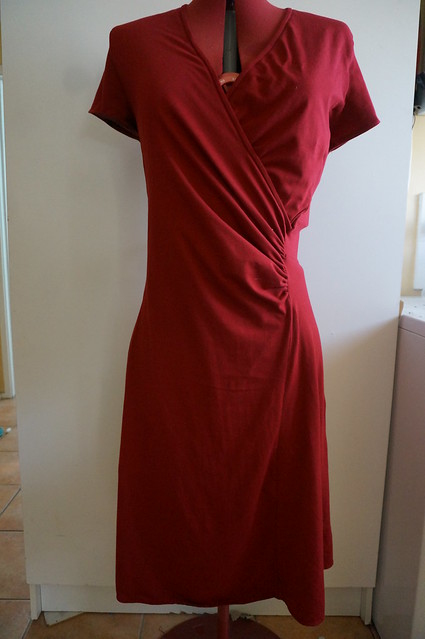
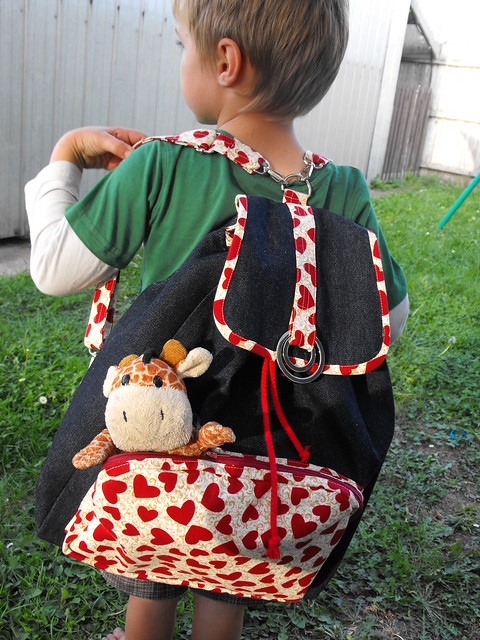
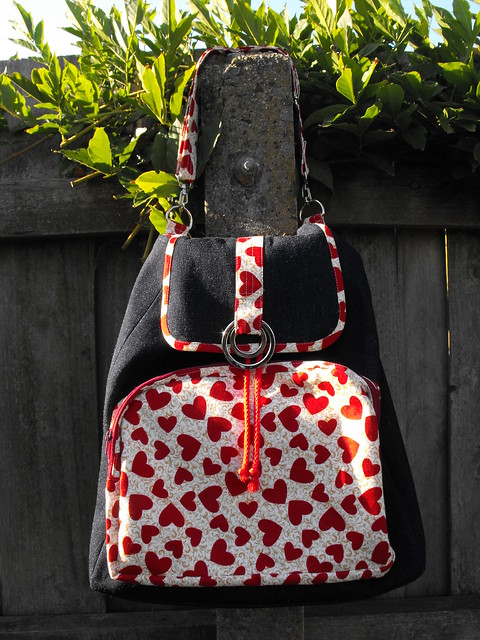
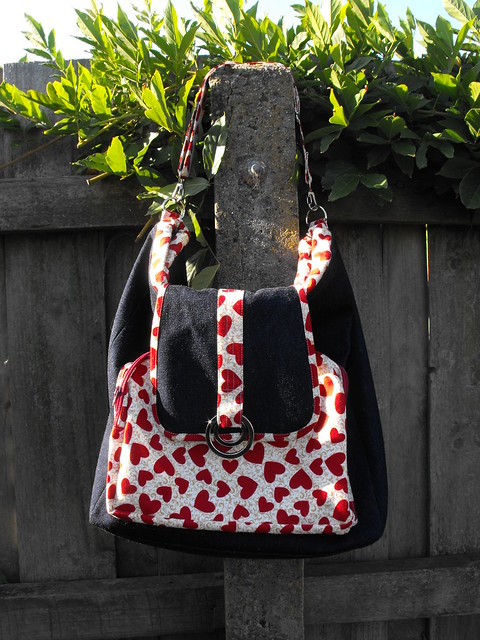
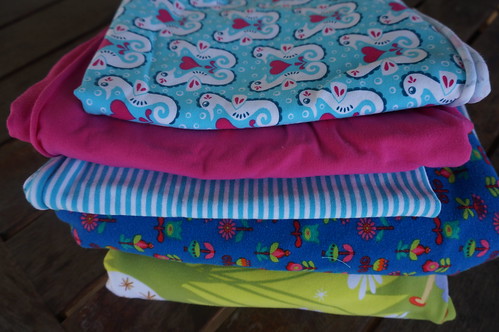
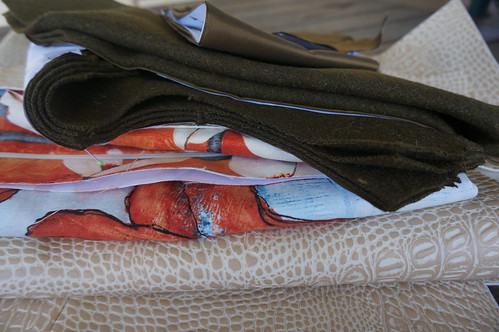
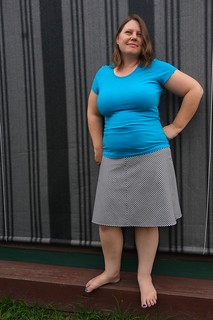
My major goal for this year is to make more things for me to wear. So far I have been keeping up fairly well with the target of at least one item per month. I seem to be focussed mainly on stretchy fabrics at the moment. This is not particularly a deliberate thing, it has just happened that way. I find stretch fabrics mostly easy to work with (provided they are of good quality), they generally sew up pretty quickly, have less fitting issues than clothes made from woven fabrics, and (most importantly) are comfortable and easy to wear with no ironing. I have a big stack of things all cut out and ready to be sewn for the boys, a fake croc-skin bag that I really need to finish, and there is also a half-knitted cardigan on the bed-side table that I must get to before Amélie outgrows it.

Working on

How does my work differ from others of its genre?
This is a really tricky question to answer. I don't set out to be different, I'm just me. I don't think there are any clear rules about what I do and don't like, I either do or I don't. Many of the "rules" I have, I break anyway.

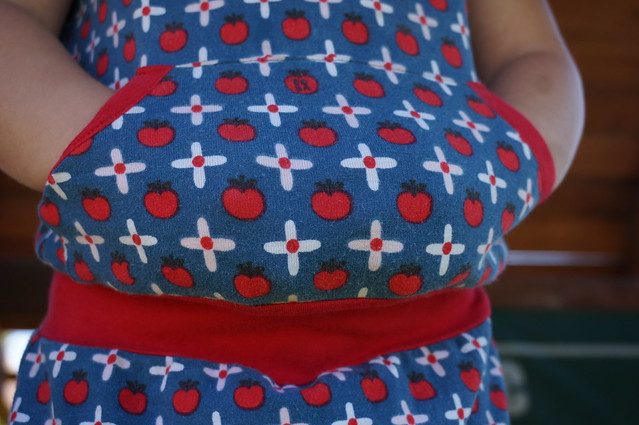
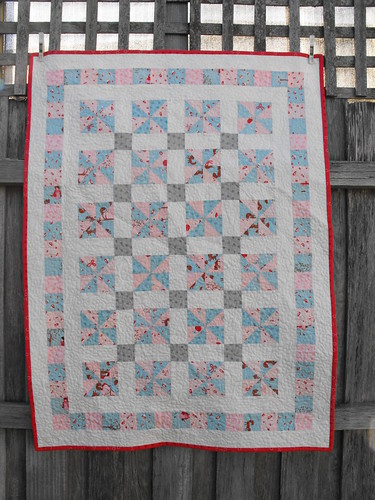
My tastes are fairly eclectic, but I tend to prefer more saturated colours, rather than pale, pastel colours. Having said that, Amélie's quilt is pretty pale.

Daisies in the Woods

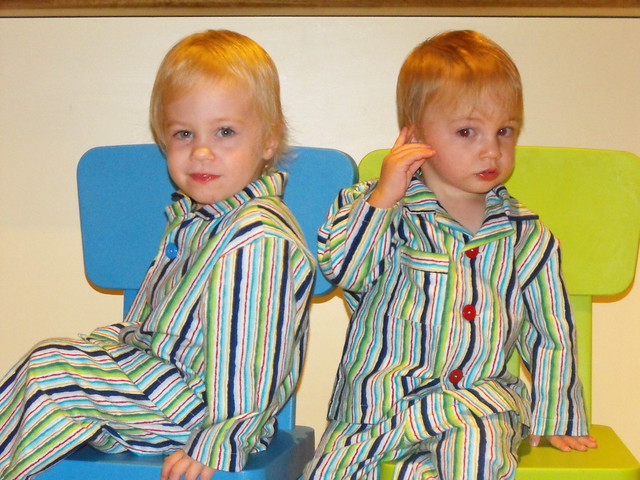
I also have a real thirst for trying something new. I generally don't make the same things over and over, but I have made a heap of Kwik Sew Pajamas.

Pajama boys

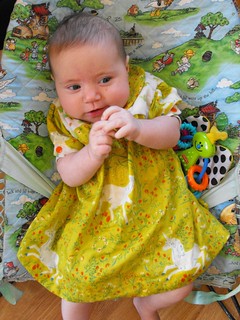
I don't like busy florals, but I love Heather Ross fabrics that are floral.

DSCF1217

So, you see, I break my own rules all the time. If there is enough to like about something, then I can see past the things that I don't like and go with what I do. I guess I am still figuring out who I am. I wonder if I will ever find myself?

Why do I write/create what I do?
I love to make stuff. I love the thrill of creating something and being able to say I made that, or I did that. I love learning new techniques. I love that my kids feel loved when I make them something that is especially for them. I love that I can make things fit better than they would if I bought them off the rack. I love it when I really get into creating so much that I can switch off everything else and just make... I mostly write about it to keep a record of what I have made and to share with my friends and family.

Redondo Collage


How does my writing/creative process work?

Ok, so in a nutshell,
  • I see things that I like and want to make,
  • I make the stuff, (creating a massive mess in the process)
  • I take photos of the finished items
  • I write about it.
  • I see new things I want to make and the process begins again.
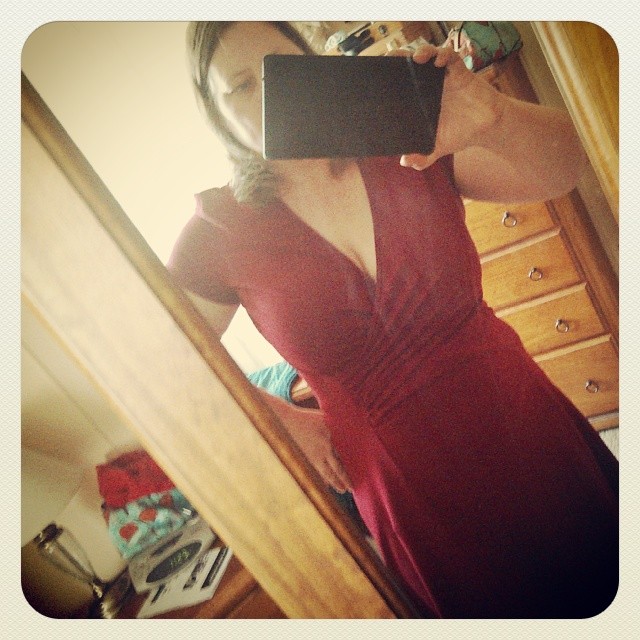
Sometimes the steps get mixed around a bit, or intersect with other projects, as I always have more than one on the go at a time, but that is generally how it works. Lately though, things have not been working for me as such. My biggest flaw, the thing that holds me back, is perfectionism. I'm not saying that I am perfect, far from it. It drives me though, and it also holds me back. If I can see something wrong with something, I have trouble letting it go. If I show a friend something I have made and she says that it's perfect, I will show her the stitch that skipped, or the slightly wonky top-stitching and show her that it is not perfect. I have no idea why I impose these standards upon myself, I don't inspect anyone else's work to see if it is perfect. As time has gone on, I have set my standards higher and higher, and now I feel that they are unreachable. The area where this is a problem for my blog, is my photography. Especially now that I am making so much for myself. This is a really big shame, as I love having my blog as a record of the things that I make. I need to learn to let go and just do it.

Stretchy Skirt

And now it is time to nominate some people to follow in my footsteps and join the blog hop. The rules say I can nominate up to three people to participate; I nominate Karen, from And so, I sew, Jodie from Ric-Rac, and my other friend Karen, from Cakes By Karen.

Wednesday 11 June 2014

Purse-frame bag

Purse Frame Bag

Whilst I have heaps of bags, I felt like I needed something that was a bit more suitable for going out (smaller), that goes with more things. I have always thought that a bag with a purse frame would be cute, but I didn't have a suitable pattern, so I made it using Nicole Mallalieu's 200mm Chunky purse pattern....

"You Sew, Girl!" Chunky 200mm Purse Kit

I guess you can tell that I had to make a few modifications to actually get the bag to look like it does using that pattern. I had to slash and spread the pattern to make it bigger in all directions, except for the frame part. I started sewing up a trial bag before I worked on the real thing, but that has mostly been abandoned.

Modified purse frame pattern

The fabric for this bag came from Darn Cheap Fabrics. I think it was about $15 or $16 per metre? It is a fake leather type fabric with a texture that I think is meant to be a bit like snakeskin. The fabric has a bit of stretch in it. I guess it is designed to make skirts or pants out of? I added some iron on wadding to help give the bag some structure and to remove the stretch. There is also boning added behind the straps to give extra support, and help keep the bag standing up straight and tall and not slouching into a puddle.

I love the newsprint lining - I think it adds to the vintage feel of the bag. Mostly, bought bags seem to have a dark lining, which I guess is meant to help hide the grime, but I prefer a light-coloured lining, as it helps me to be able to see inside a bag.

Purse Frame Bag - look inside!

I used the instructions in Nikki's new book "The Better Bag Maker" to help me make the zipped pocket inside. Normally, I would be going through my pattern stash, looking for which patterns have that set of instructions, or check my notes from the zippers for bags class I attended - but now I have the book, so I can save myself heaps of time by just referring to that.

The purse also has a nice hard base and cute little round purse feet on the base. Instead of just using it to go out, it seems to have become my everyday bag.

Friday 6 June 2014

Made for Me - March Dress

March dress

Ok, so I realise that it is now June and I still haven't showed you the dress I made for myself back in March. I am finding it challenging (on many levels) to take photos of myself, wearing the things I have made. Never mind, I will get over myself and catch up eventually, I am sure...

Anyway, this dress is made using New Look pattern 6429, view C. As I have a long torso, I attempted to lengthen the top half of the dress. There is a seam across the back that is already above the waistline, that would have looked really funny if I had not. Lengthening the torso was not easy, as there are no shorten/lengthen lines to be able to do so, so there was a bit of fiddling around, and some moving of dots and notches. I am still not sure I really got this right, but it seems to work.

New Look 6429

Oh, by the way, this is my mannequin. She has come from my mum's house to stay here. As you can see, she is a bit skinny and it looks like her boobs are in a completely different place to mine, but maybe with some padding, I might be able to sort her out. Or she can just become my clothes horse for modeling my new clothes if I am too shy, or technically challenged to do it myself.

DSC01424

Another modification I made to this dress was that I replaced the neckline facing with some binding that I cut from the same fabric as the dress. I found the concept of a facing in a stretch dress to be a bit strange. Particularly because that facing is to be interfaced, which would make it not stretchy. When I added the binding, I made sure to stretch it a little tighter across the bust area, where the dress "crosses over". This was to help keep everything inside the dress, where it should be. I have a tendency to burst out of cross-over dresses and tops as time goes by, but this dress is safe at least for long enough for me to go out for dinner. I really do wonder about that facing and if there are advantages to having those parts of the dress stabilised in such a way?

Overall, I am fairly pleased with this dress. I may even make it again, out of some better fabric. We shall see...

Saturday 31 May 2014

3 Easy Steps to Make Better Bags

Toronto Convertible Tote-backpack

Step one - GET THIS BOOK!
Step two - read it
Step three - make all the things!!


The Better Bag Maker Book

Nicole Mallalieu's latest book is hot off the press and oh boy, is it a good book or what?!! The book comes with the patterns you need to make ten different bags graduating from a basic tote at the start, right through to the fancy-schmancy Toronto backpack as you can see above. I made this backpack about a year ago as a pattern test for the book. It is a really versatile bag, as it converts from a handbag style that you can pop under your arm, to a tote so you can fit in a little more shopping, and then, when you've been at the craft show all day and you're running out of hands to carry all your shopping, it can convert to a backpack!

Toronto as a tote

But ten great bag patterns isn't even the best bit. The part that you will really be loving is the bit right at the start, where Nikki tells all of her best bag-making secrets. Since I started using Nikki's patterns, and learning all her clever tricks, I really feel that my sewing has improved by leaps and bounds. The Better Bag Maker covers quite a lot of the techniques that Nikki uses in her patterns, all in one place. This book tells you how to make professional looking straps, crisp corners and insert zippers like a pro. Nikki shows you how to choose interfacing, as well as how to apply it. You also learn how to install all the yummy metal bits, like magnetic snaps, o-rings and purse feet, that take your bag from homemade to hand made. There are also plenty of different pocket options so that you can make your bespoke bag work the way you want it to. The best part of all this, is that you can use all these great tips on all your other sewing and make everything you do look more professional!

Toronto as a shoulder bag

I am so pleased to have this book on my bookshelf, it is a great reference to have and I have already used it to help me install a professional looking zip pocket inside my latest bag, but that's another blogpost!

Saturday 29 March 2014

Another Shirred Dress

Amélie Shirred Dress

One of my favourite things to make for Amélie is a shirred dress. They are relatively quick and easy to make, and fit for a long time. A couple of her older ones have been worn as tops as they got too small to be dresses anymore.

Shirred dress - full length

You don't need a pattern, just a rectangle of fabric. There is very little wastage as I use the whole width of the fabric and just square it up. This particular dress was extra thrifty as I purchased the fabric (poly-cotton) which was already cheap, on sale and I used (Spotlight) vouchers as well.

Do you have any easy things that you like to make over and over for your kids? Particularly pattern-free things?


Tuesday 18 March 2014

Embroidery Design Websites

Stitching out the Deer

When I first bought my embroidery machine, I had no idea where to get embroidery designs. I had the disc of designs that came with my machine and Mum hooked me up with Embroidery Library, Anne the Gran, Secrets of and Sue Box. I still buy most of my designs from Embroidery Library, and think that Sue Box is the most exquisite embroidery designer I have seen (just watch one of her free designs stitch out, I guarantee you will be impressed). Since then I have gathered a list of links to other embroidery designs. Some of them I probably will never purchase from, but they all have their own style and it is always nice to have a list of sites to browse when you are looking for something a bit different.

Here is a list of websites where you can buy embroidery designs. It's in no way conclusive. I will probably come back and add some to the list and maybe even do a few little reviews and link from here. Let's consider it a jumping off point;

Anja Rieger Design

Ann The Gran

A Stitch and a Half

Designs By Juju

Divas Doodles

Embroidery Library

EmiOli Design

Five Star Fonts Embroidery

GG Designs Embroidery

Huups

Kunterbunt Design

Newfound Applique

Nobbie Neez Kids

Secrets of Machine Embroidery

Stitch On Time

Sue Box Creations

Tinimi

Urban Threads

Zaubermasche

Have you bought any designs from the above websites? What was your experience like? Do you have a favourite site that I haven't listed? I would love it if you could link me up with any blog posts that you may have done that show machine embroidery that is from these (or other) websites.

Tuesday 11 March 2014

Doe, A Deer

Doe, a Deer


From the moment I saw them, I knew I had to have this embroidery design pack from Embroidery Library. The embroidery pack is called Springtime Frolicking Friends and comes in three different sizes. I chose to go with the medium size which I think is quite large, as it turns out. It's the perfect design to pretty up a cheap, plain t-shirt. The design pack has the deer featured with a bunch of other little forest friends, including a rabbit and a skunk (remind you of anyone?). The design I used stitched out beautifully, without any problems.

A female deer


I hooped the t-shirt and the stabiliser together - I used a cut-away stabiliser, rather than a tear-away. The tricky part for me, was trying to keep the rest of the t-shirt out of the way, which I did using safety pins, bulldog clips and Clover Wonder Clips. The t-shirt I used was a size 3, I don't think I would attempt to do this on a smaller t-shirt, it was really quite fiddly, but I got it to work.

Stitching out the Deer


Have you got an embroidery machine? Purchased any good designs lately? Any suggestions as to easier ways to hoop up a small child's t-shirt?

Sunday 9 March 2014

Win a Craftsy Class!

This competition is now closed

Craftsy Logo

I was recently asked if I would like to host a giveaway on my blog for Craftsy. Of course I would! I enjoy giving awesome prizes to my readers and I've done a few Craftsy Classes and I love them.

Craftsy is an online facility that provides hundreds of different classes in heaps of craft categories including (just to name a few)
Craftsy topics
The interactive classes are presented in video format with downloadable notes and patterns, and you can discuss the class with your classmates, upload images of your finished work and even ask your tutor questions. Some of the tutors include Camille Roskelley, Sandra Betzina, Leah Day and Angela Wolf. The classes are there forever, for you to come back to and you can do them at your own pace at a time that suits you.

It costs nothing to join Craftsy. You might also be interested in checking out some of their free mini sewing, quilting or photography classes. The free classes are not quite as extensive as the paid classes, but will help to give you an idea of how it all works.


Would you like to win a Craftsy class? 

Entering is really easy,
just click on the link below
and enter your details.

Sorry
This competition is now closed

The competition will remain open until the 30th of March. 
The prize is a Craftsy Class of your choice, up to the value of $59.99. 
Craftsy will draw the winner and 
I will announce the winner, here on the blog in April.


Have you taken any Craftsy Classes?
Which classes have you taken?
Which class would you like to try if you win?


*This post contains affiliate links.

Saturday 1 March 2014

A Simple Stretchy Skirt

Stretchy Skirt

This is by far the most comfortable item in my wardrobe at the moment. Actually, if I am honest, it is not making it to the wardrobe and is perpetually in the wear-wash-dry-wear cycle. The fabric has been in my stash for quite some time. I am not really sure how it got there, I am pretty sure it was given to me, so free fabric. I have known for some time that it was going to be a skirt and when I first laid my eyes on the Everyday Skirt Tutorial, by iCandy Handmade. I knew it was going to be THAT skirt.

I had a few reservations about the straight bottom edge on the skirt in the tutorial, though. I think if you are making a skirt with horizontal lines, then a straight edge along the bottom is probably not a bad look. But when you are making an A-line skirt, those bottom corners are just a little bit funny to me. I don't mean to criticize the tutorial. I think it is a fabulous tutorial, and the skirt looks great on, it is just me being a bit fussy.

Stretchy Skirt close up

So, rather than set about drafting myself a pattern for the skirt, I thought I would take a short cut and use a skirt pattern that I already have drafted myself from the book "Sew What Skirts". I traced my original pattern, adjusting the length to allow for the bigger waistband,and put a diagonal line across the pattern to line up the stripes on to get the chevron effect. Even though I could have used the same pattern for the back as I did for the front, I traced a second pattern piece to make it easier for me to lay out my pattern pieces on my fabric and ensure it was all going to fit. When I cut the skirt out, I very carefully folded my fabric in half, lining up the stripes, and instead of placing the centre front/back on the fold, I added seam allowance, and cut it out fully .

Stretchy A-line skirt

Of course, this skirt pattern was going to be too big. Far too big. I knew this, but it was bigger(er?) than I thought it was going to be. In the end, I just kept shaving fabric off the edges until I was happy with the fit. I would sew it, try it on, cut off my seams and re-sew it until the fit was right. Trial and Error. Once I was happy with the fit of the skirt, I set about making the waistband.


I didn't have enough fabric to make the full-sized yoga band in the pattern, so I cut myself a waistband that was half the width, and then cut it horizontally to make a front and back waistband - so my waistband is half the height of the waistband in the tutorial. I ended up cutting a fair bit from the sides of the waistband, in much the same way I did with the skirt. I then also trimmed this several times until I felt that it was tight enough to support the weight of the skirt. This was based on instinct, so I am unsure how I could tell someone else how to make that judgement, other than to try it and know that you can always pull it apart and sew it back together until you are happy with it.

Stretchy Chevron Striped Skirt

Have I mentioned how much I LOVE this skirt? Seriously, I want half a dozen of these. Not only is it comfortable, but I don't even need to iron it. When the weather turns cold I will wear it with tights. I was on tenterhooks the first time I washed it as I couldn't remember ever pre-washing the fabric before I made it, but it all turned out fine (phew!). I do need to organise myself to trace the skirt off to make a more accurate pattern for the next skirt. I do think the ideal size is going to vary according to the fabric and how much stretch it has and how heavy it is too, so probably will still need to do a fair bit of trial and error.

My goal this year is to make at least one item for me each month. This was my "Made For Me - February" item. In case you missed it, you can see my January item here.
Blogging tips